5. Tutorial#
This tutorial will cover the main activities you can perform in the different services composing OrchestraCities. For your convenience, you will find links to all the services at the homepage of the Portal.
Many of the steps of this tutorial are given as curl commands, but if you are familiar with Postman, we have a collection at /docs/rsrc/ that you may want to import to make things easier. To use it, you will need to define a Postman Environment with the following variables:
| Postman Variable Name | Value |
|---|---|
| {{server}} | auth.s.orchestracities.com/auth/realms/default |
| {{apiServer}} | api.s.orchestracities.com |
| {{username}} | your orchestracities account email |
| {{password}} | your orchestracities account password |
| {{client_id}} | resource_server |
| {{client_secret}} | get the secret of the resource_server client from Keycloak's api |
| {{token}} | this will be set for you when you follow User API Authentication section |
5.1 User Management#
User Management can be performed directly inside of Keycloak's admin UI, or through the Portal's UI.
5.1.1 Create a user with Keycloak#
To create a new user, log into Keycloak's admin UI. Make sure your Keycloak account has admin privileges on Keycloak to allow for the creation of new users and assigning roles to them.
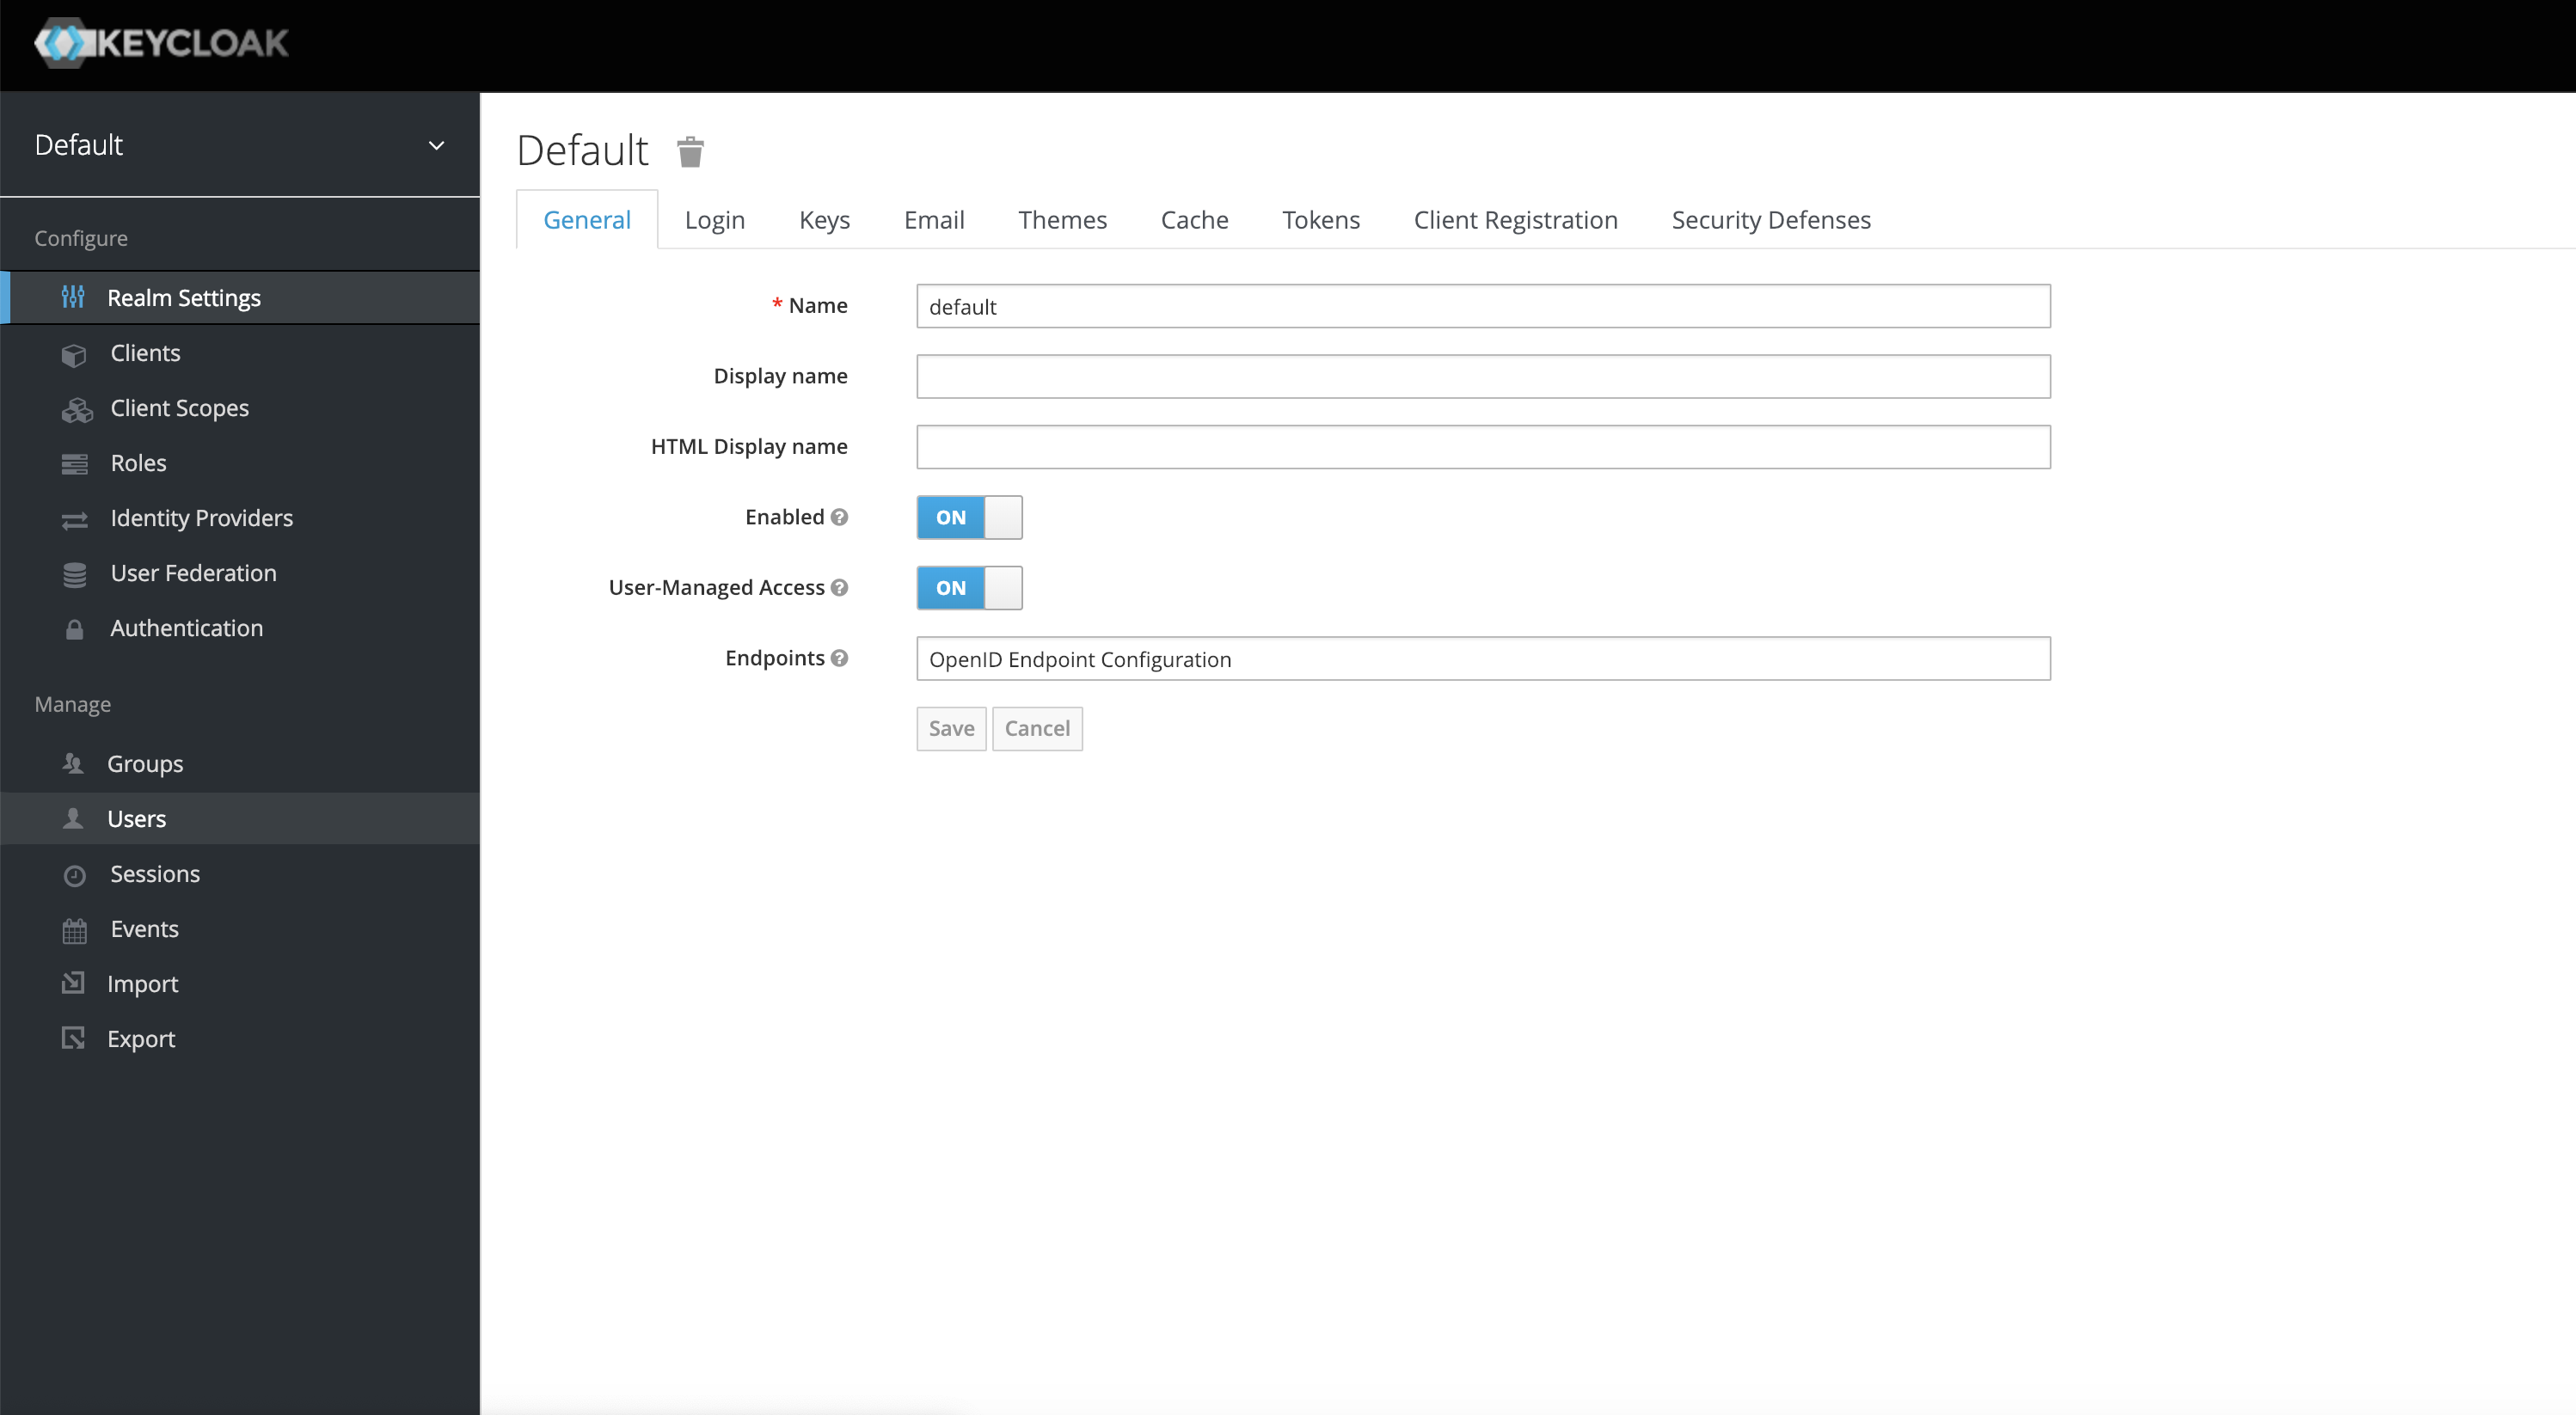
From the Keycloak Admin UI, select "Users" on the left sidebar, and from there click on "Add User". Fill in the new User's details and click on "Save".
Back on the Users page, find the newly created User and click on it to bring up its details page. Under the groups tab, add the user to at least one tenant group for the Portal, in this case it should be "OrchestraCities".
5.1.2 Create a user with the Portal#
To create a new user, log into the Portal. Your Keycloak account needs to have the required privileges to do so just like with the Keycloak Admin UI procedure. If your account does, select on the nav bar the tenant you want the new User under, then click on Admin, and then Users.
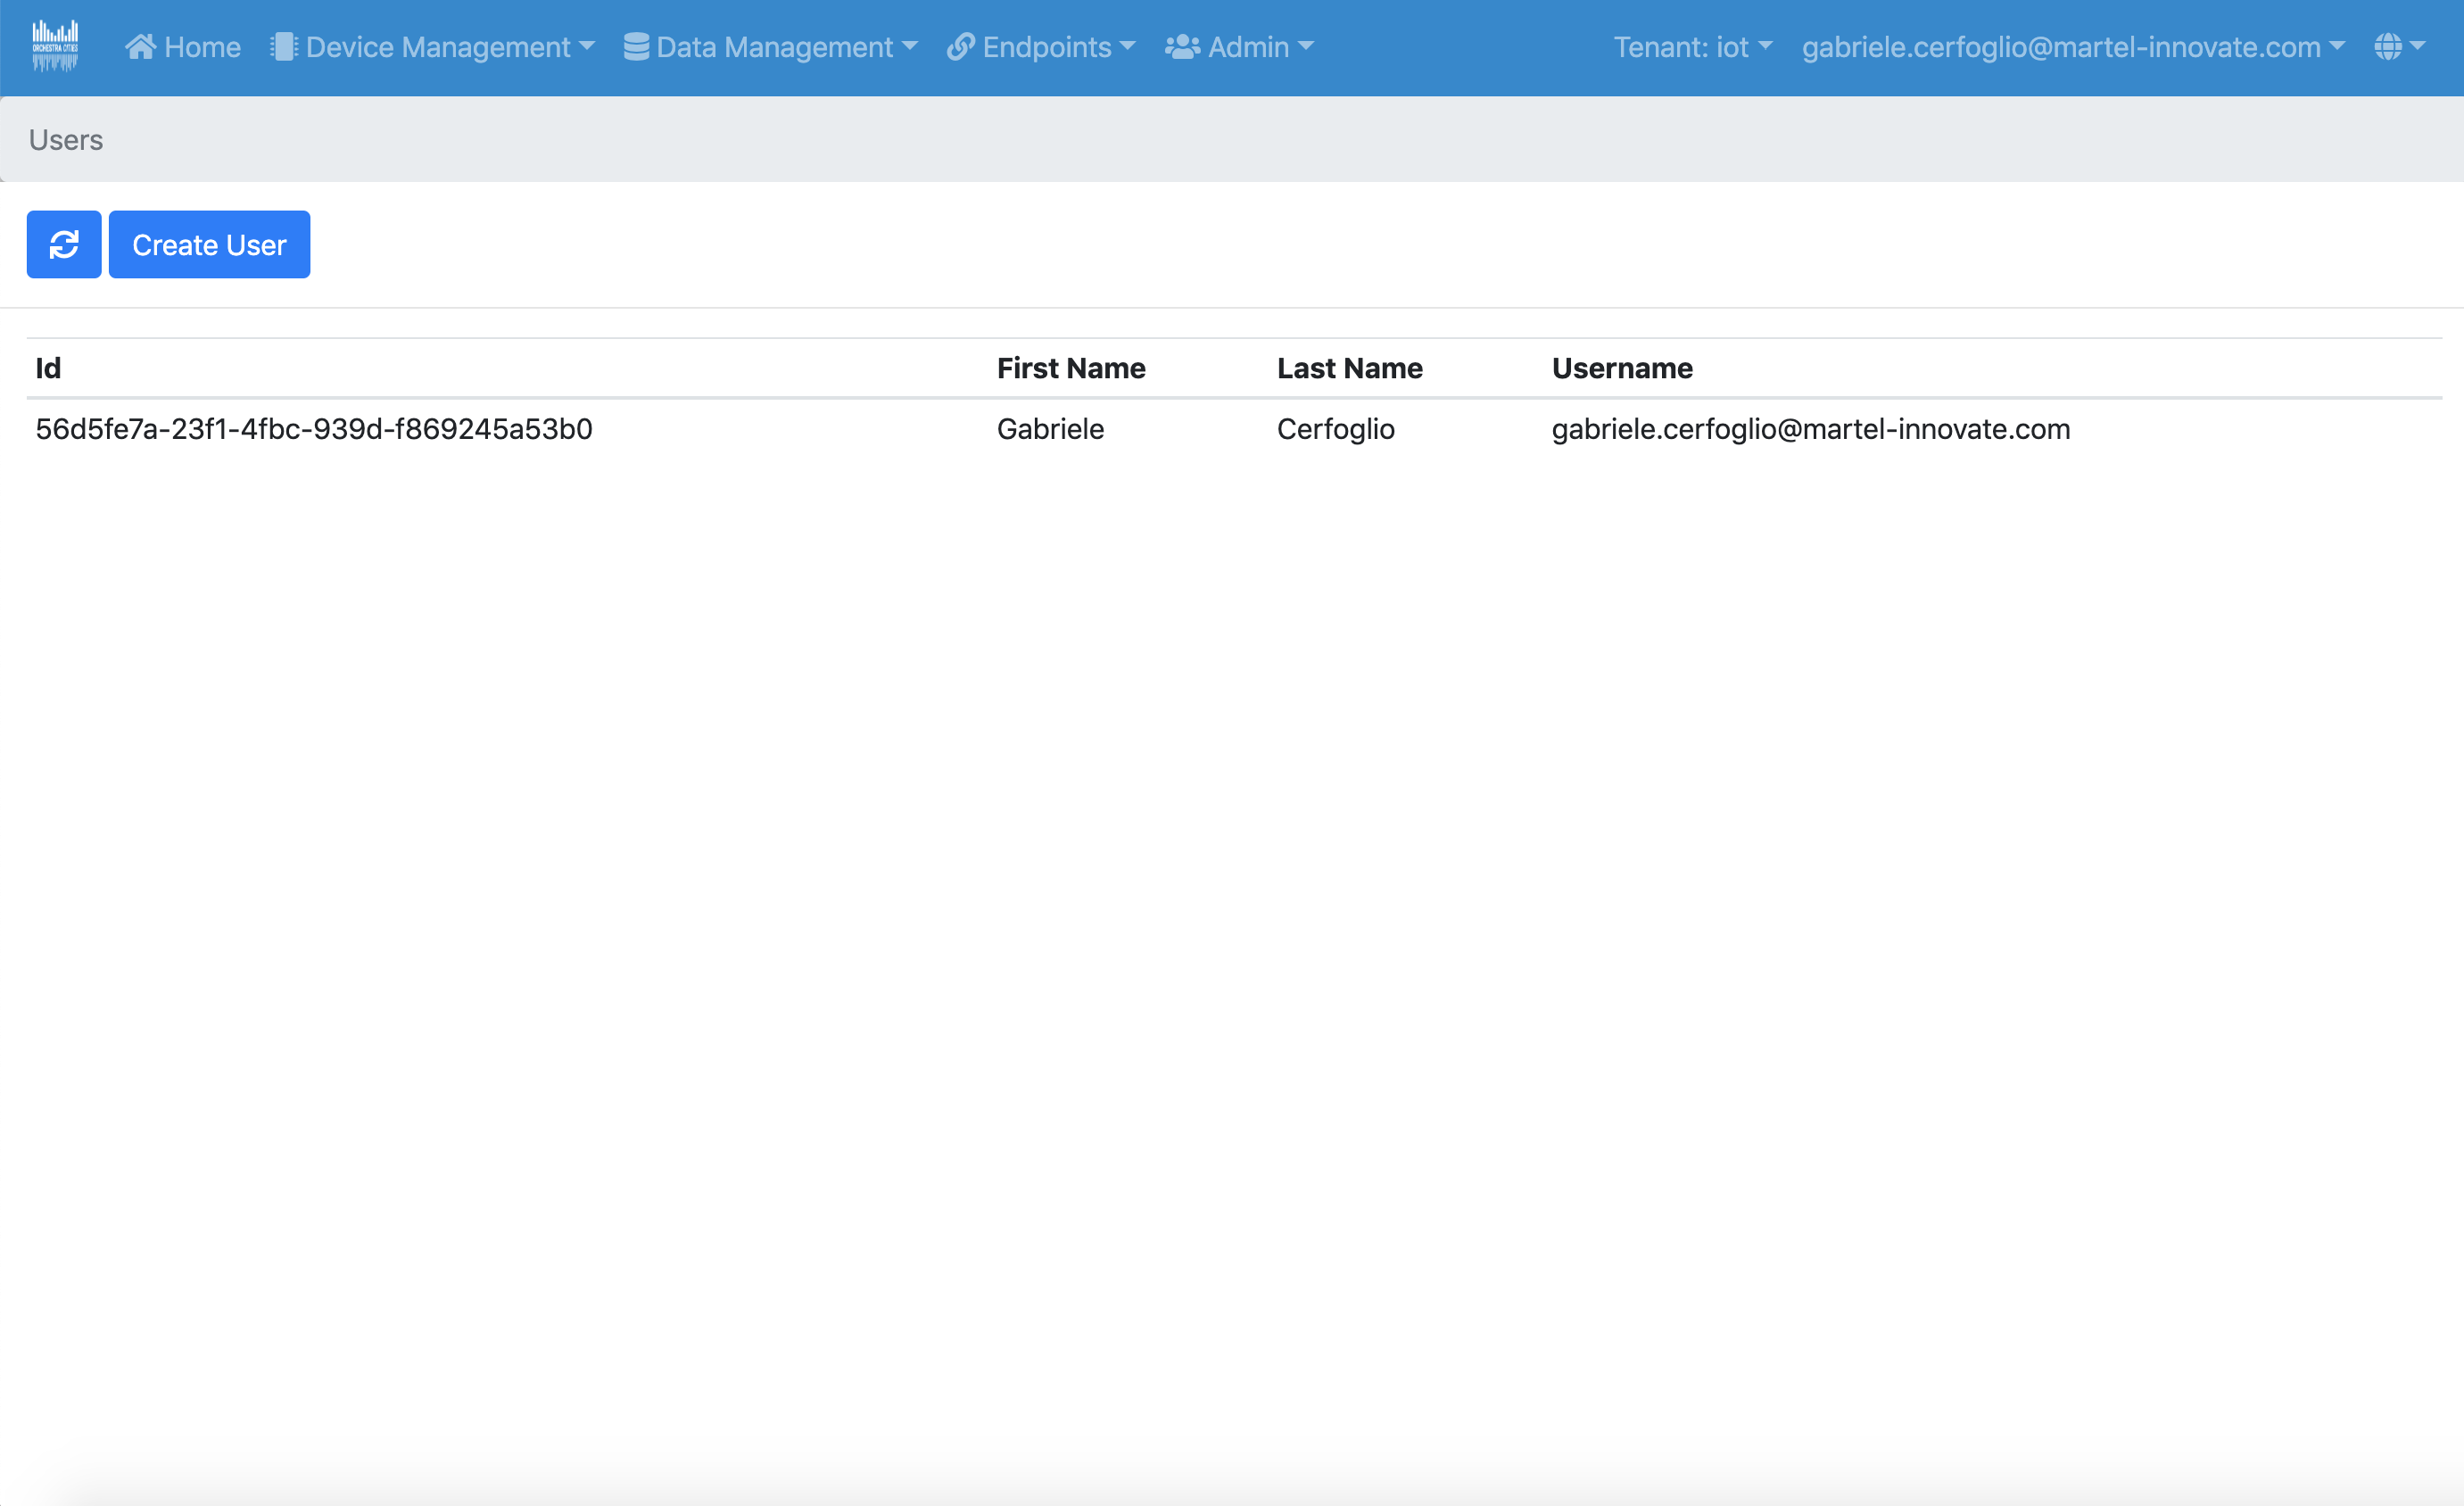
From there you can click on New User to bring up a User creation form. Fill in the required details and create a new User from there. Note: a User must be added to at least one Group to start, so ensure at least one Group exists.
5.1.3 Create Service Groups with Keycloak#
From the Keycloak Admin UI, select "Groups" on the left sidebar. You'll be presented with a list of groups and subgroups. The root groups represent the tenants, while their subgroups are either Service Groups or User Groups.
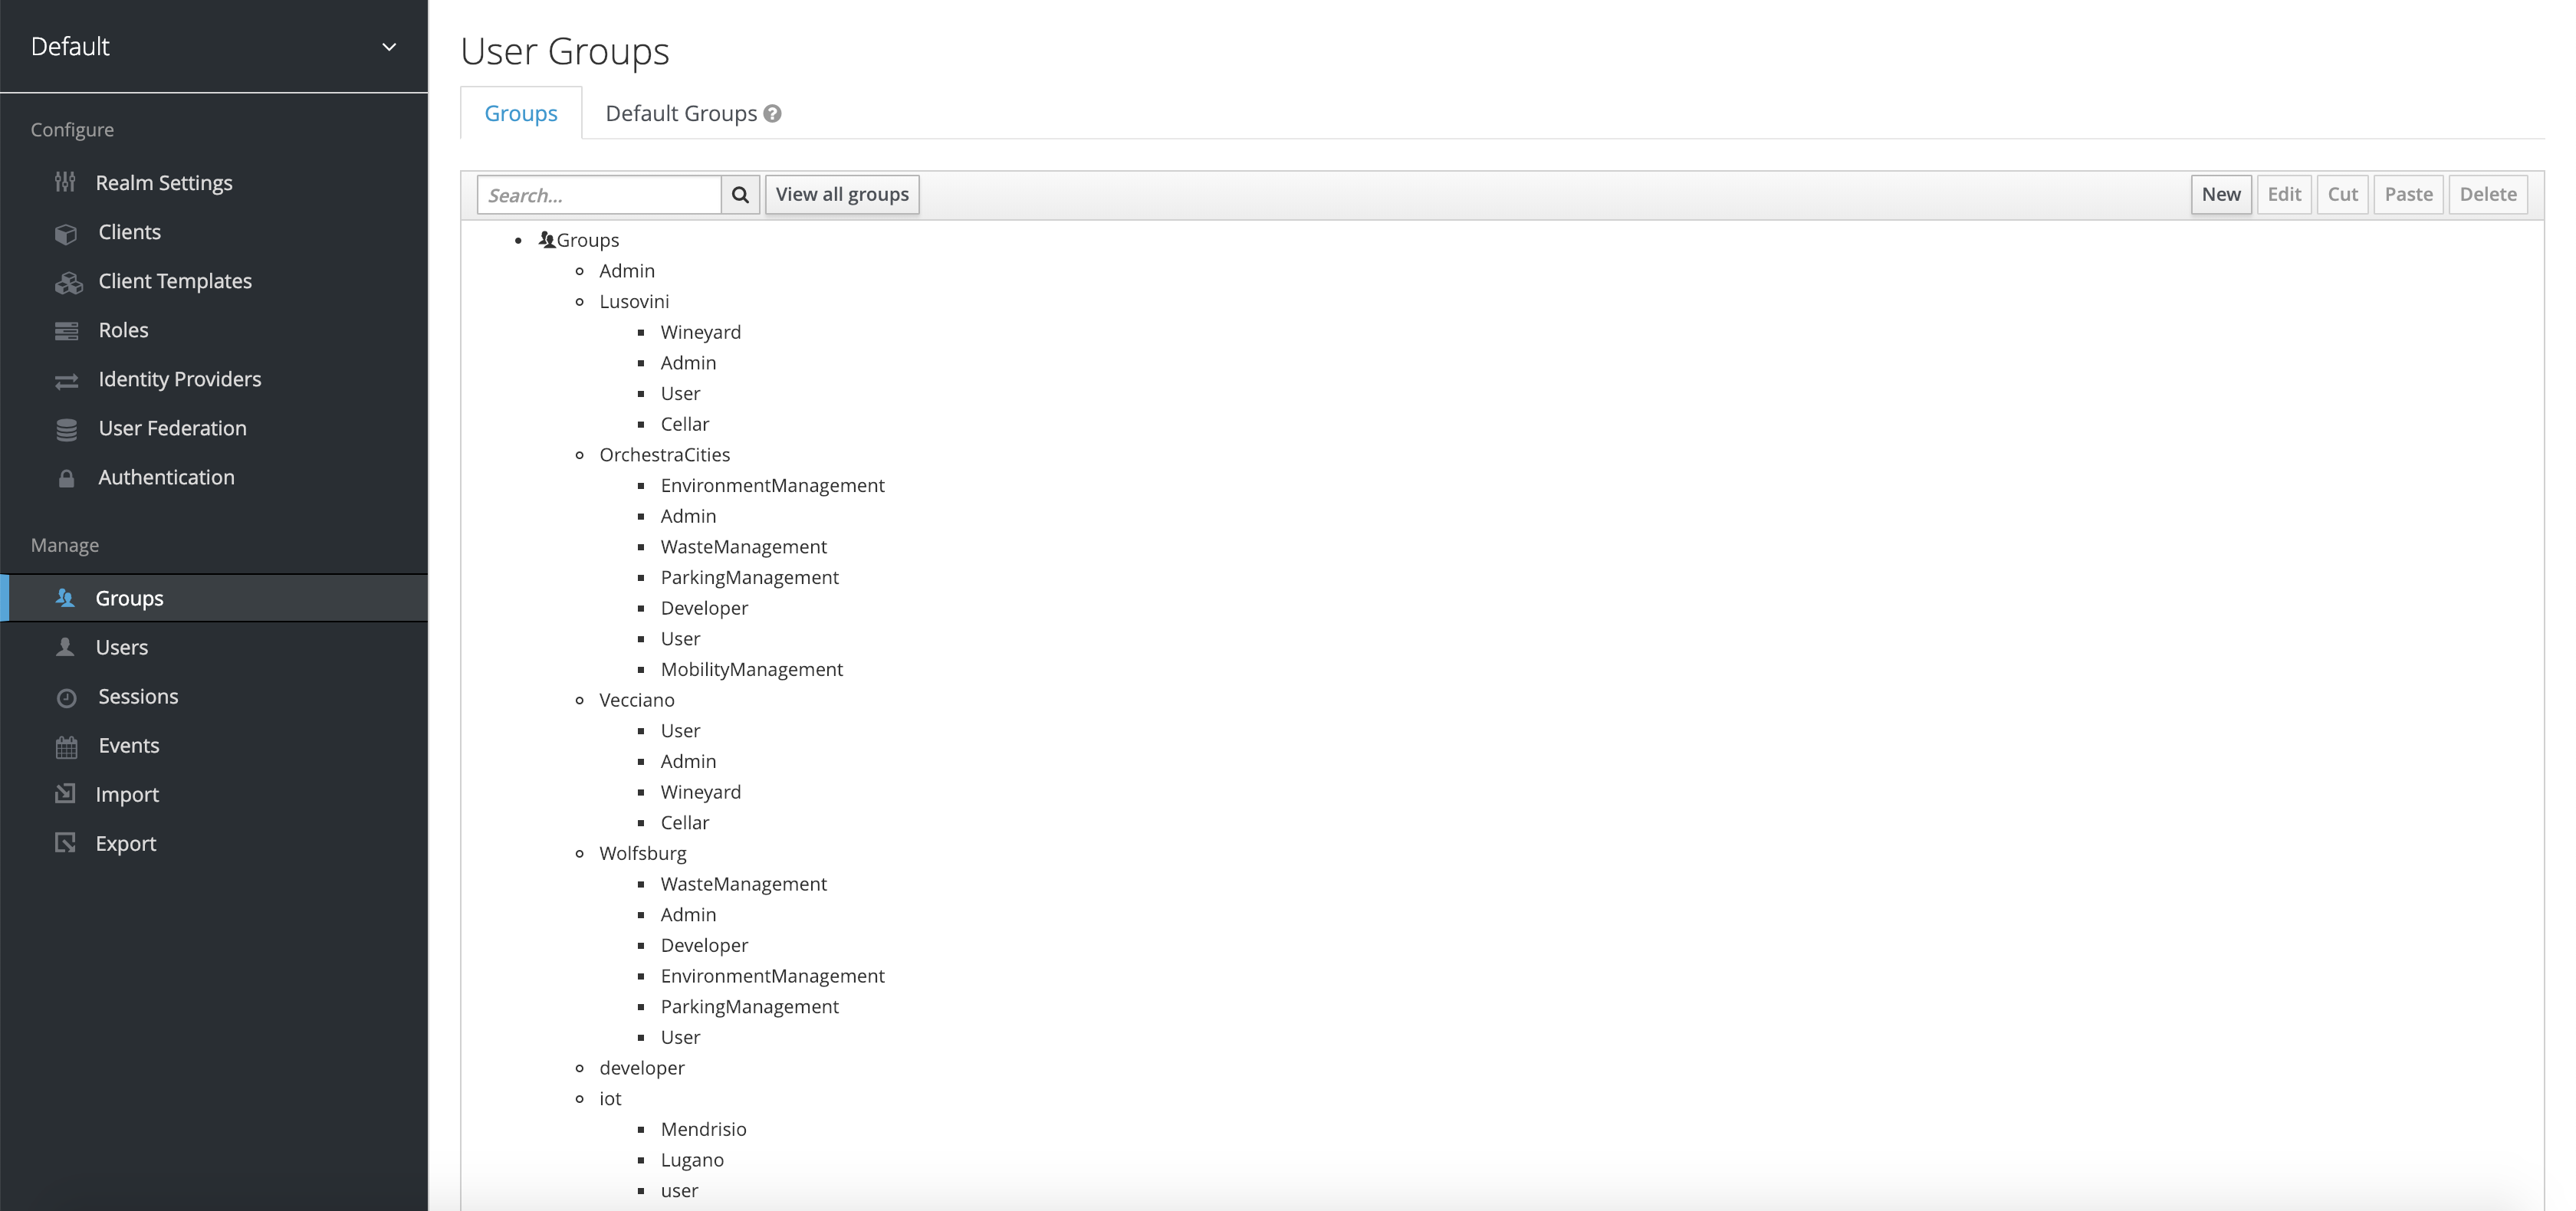
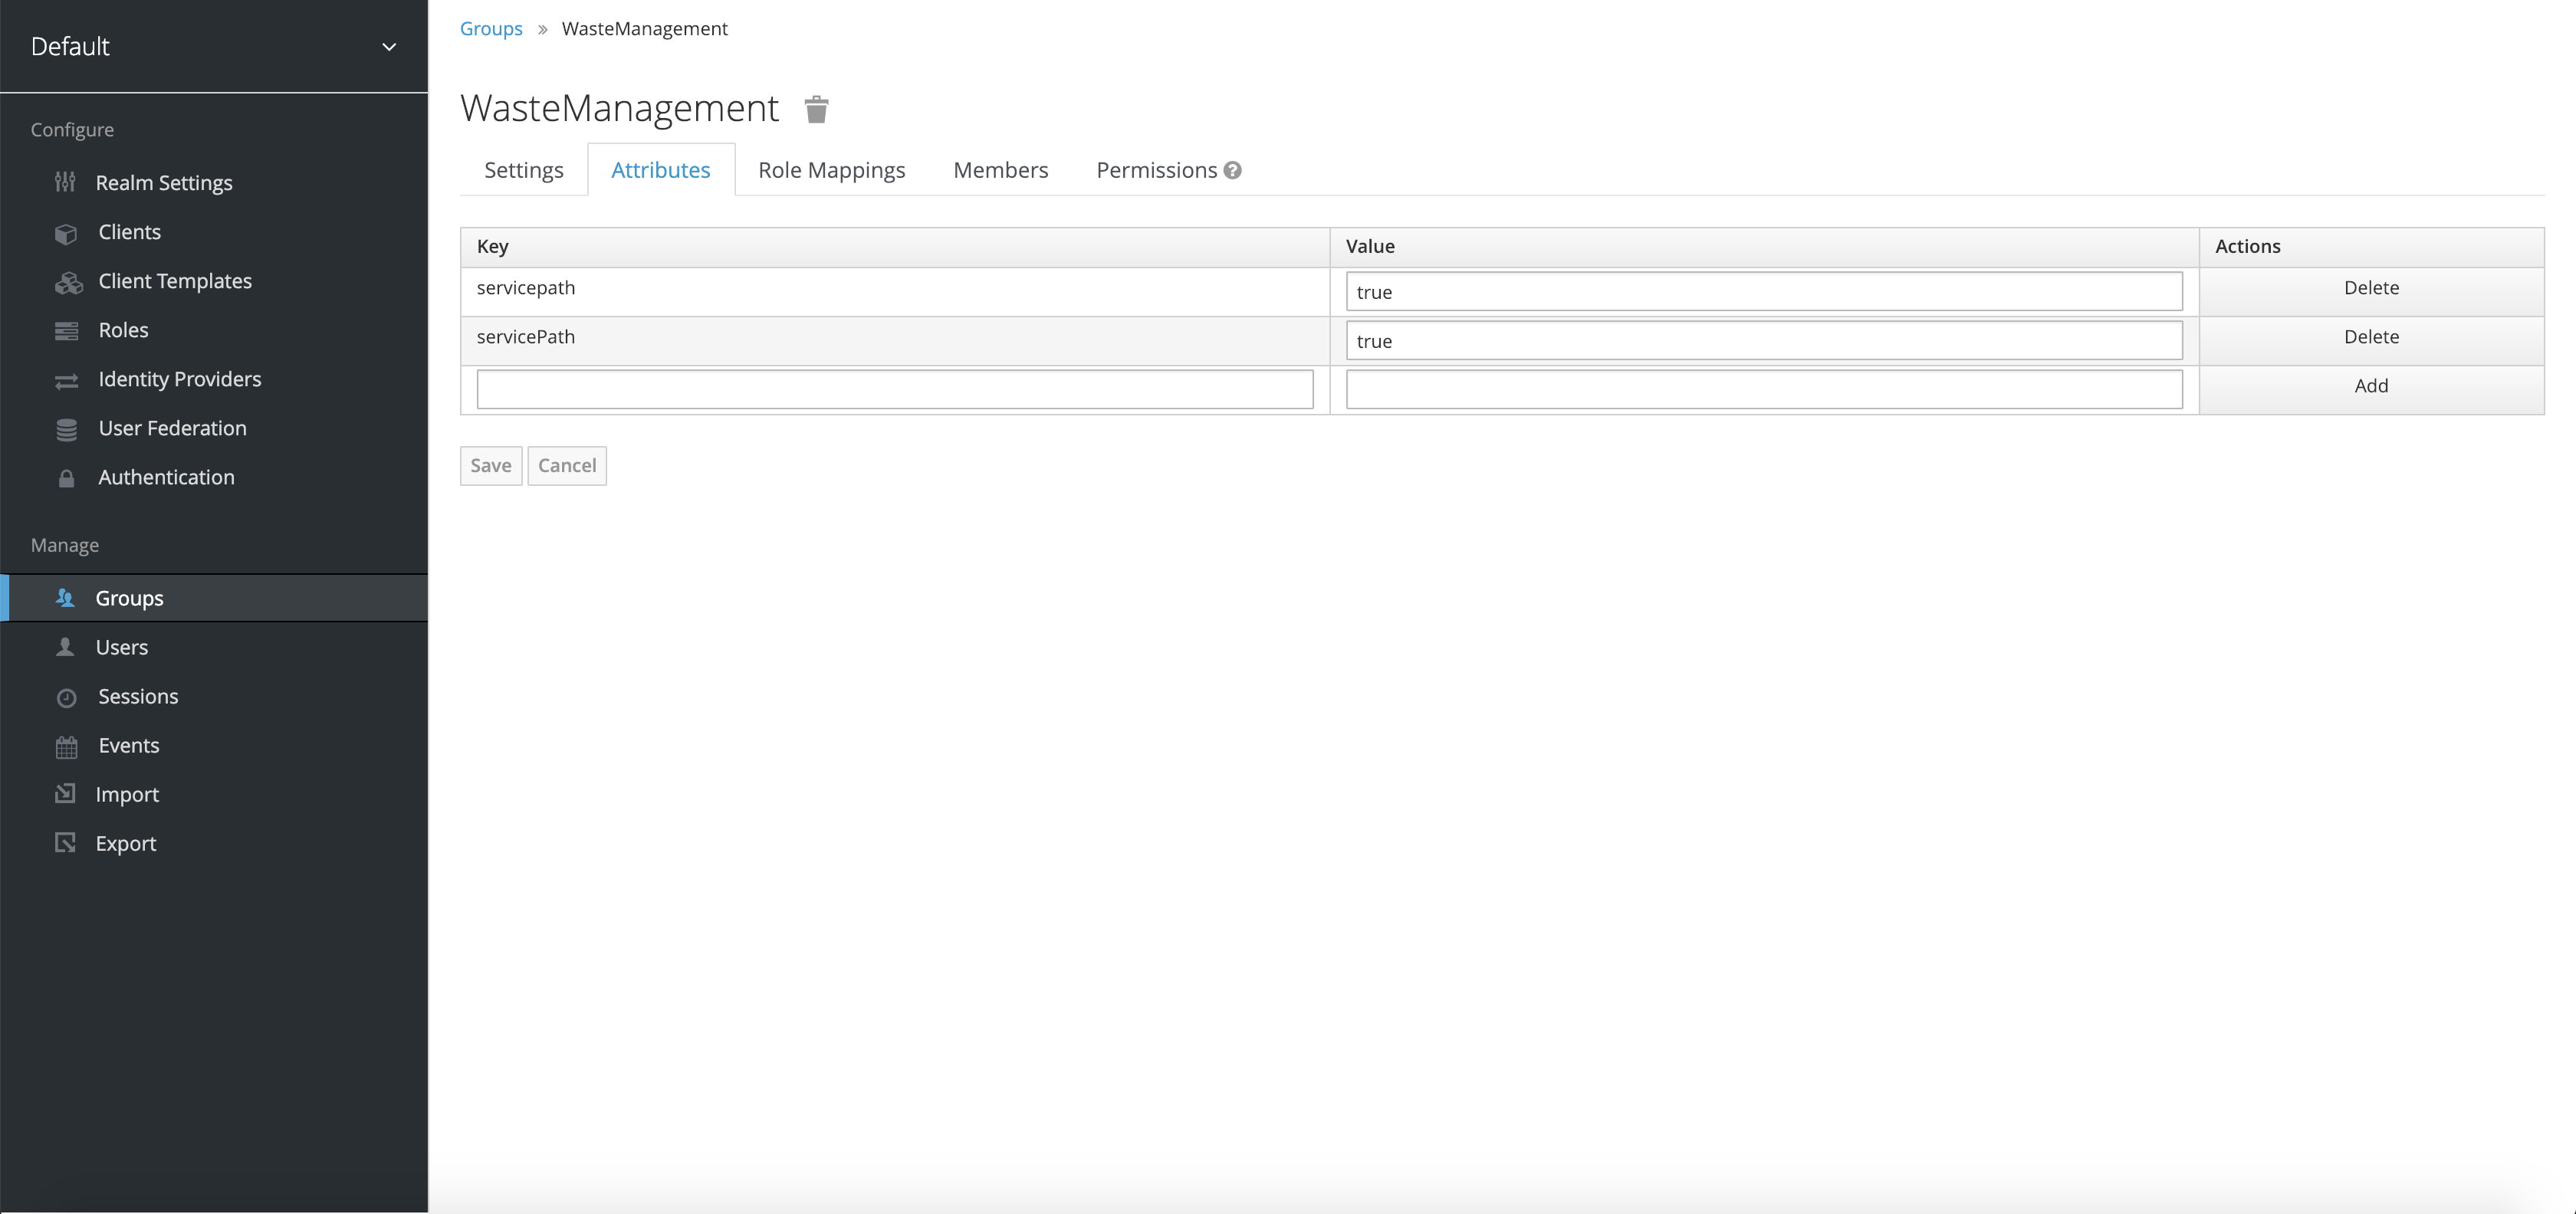
To create a new Service Group for the "OrchestraCities" tenant, click on "OrchestraCities" (do not worry if it doesn't look like it's being highlighted), and then click "New" on the top right. Enter a name for the new Service Group and click "save". The new group should now appear under "OrchestraCities". In order to define it as a Service Group, click on it and then click 'edit' on the top right. On this new page, select the "Attributes" tab. From here, add two new attributes with keys "servicepath" and "servicePath", both with values set to "true". Make sure to click the "add" button on the right for each before clicking "save" at the bottom.
5.1.4 Create User Groups and Assign User Roles with Keycloak#
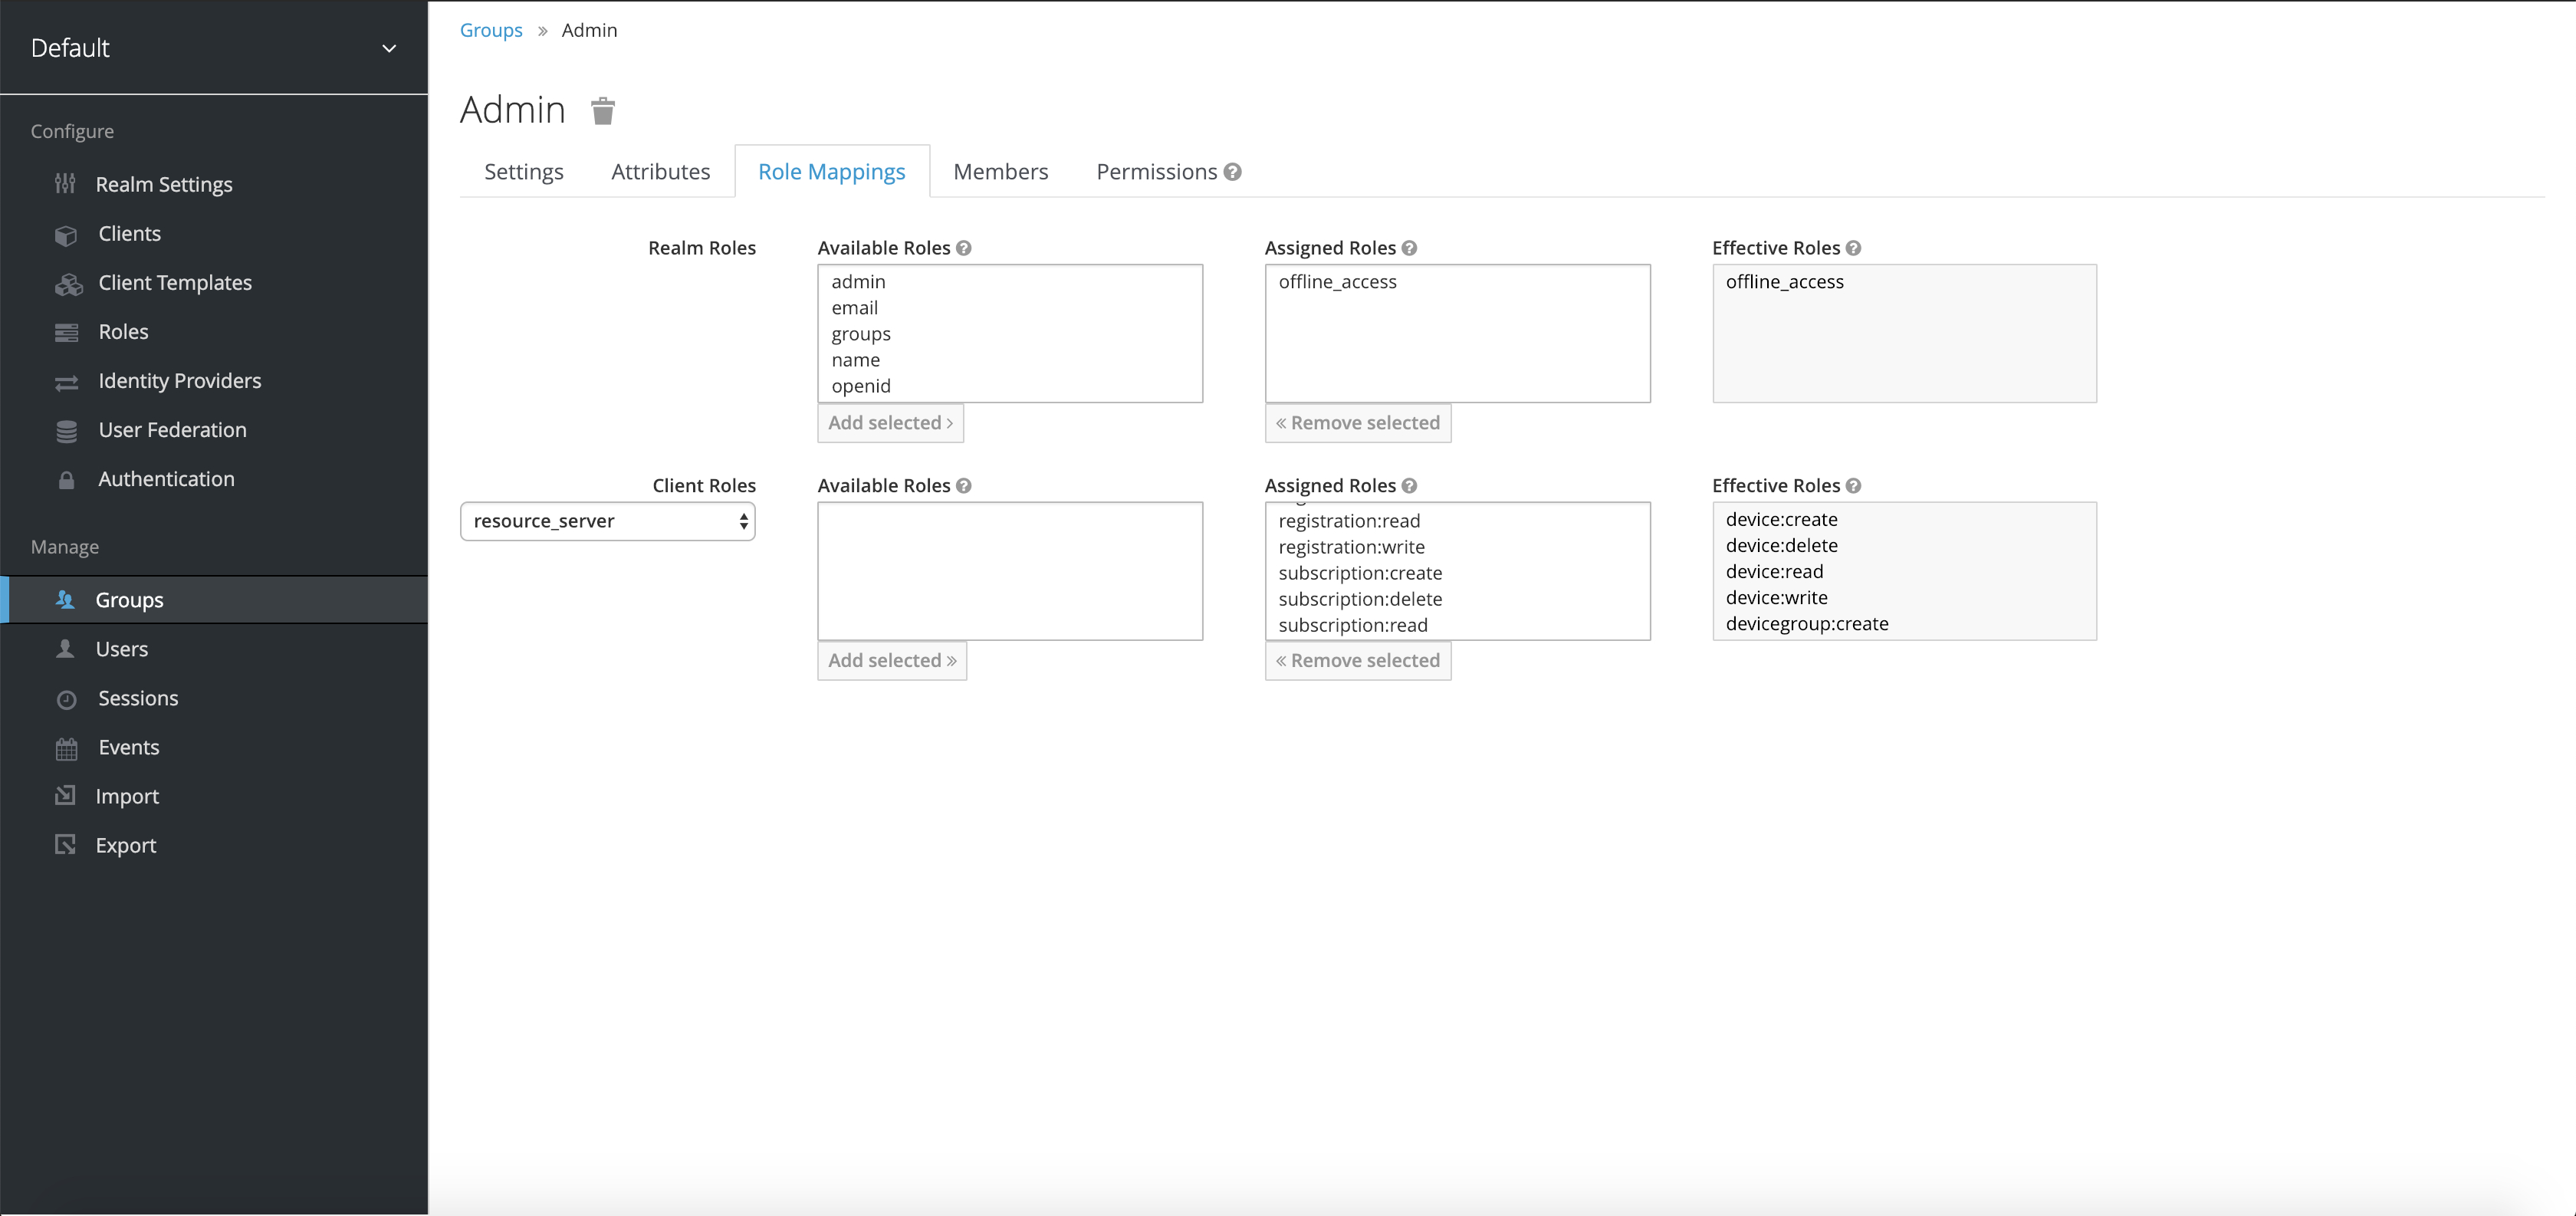
Creating User Groups is similar to creating Service Groups. Once again, go to the "Groups" page, click on "OrchestraCities" and then click "New". Enter a name for the new User Group, and click "save". Now click on the newly created group and then on "Edit". This time, select the "Role Mappings" tab. Here you will see a section for "Realm Roles", and a dropdown menu for "Client Roles". From that dropdown menu select "resource_server". This will bring up three lists for "Available Roles", "Assigned Roles", and "Effective Roles". You can select entries in either the "Available Roles" or the "Assigned Roles" to add or remove roles from this User Group, which include the ability to read, create, write (edit) or delete for Device, Device Groups, Entities and so on. Adding or removing Roles will automatically set those Roles to the group, no need to click on any save button this time.
5.1.5 Add users to User Groups or Service Groups with Keycloak#
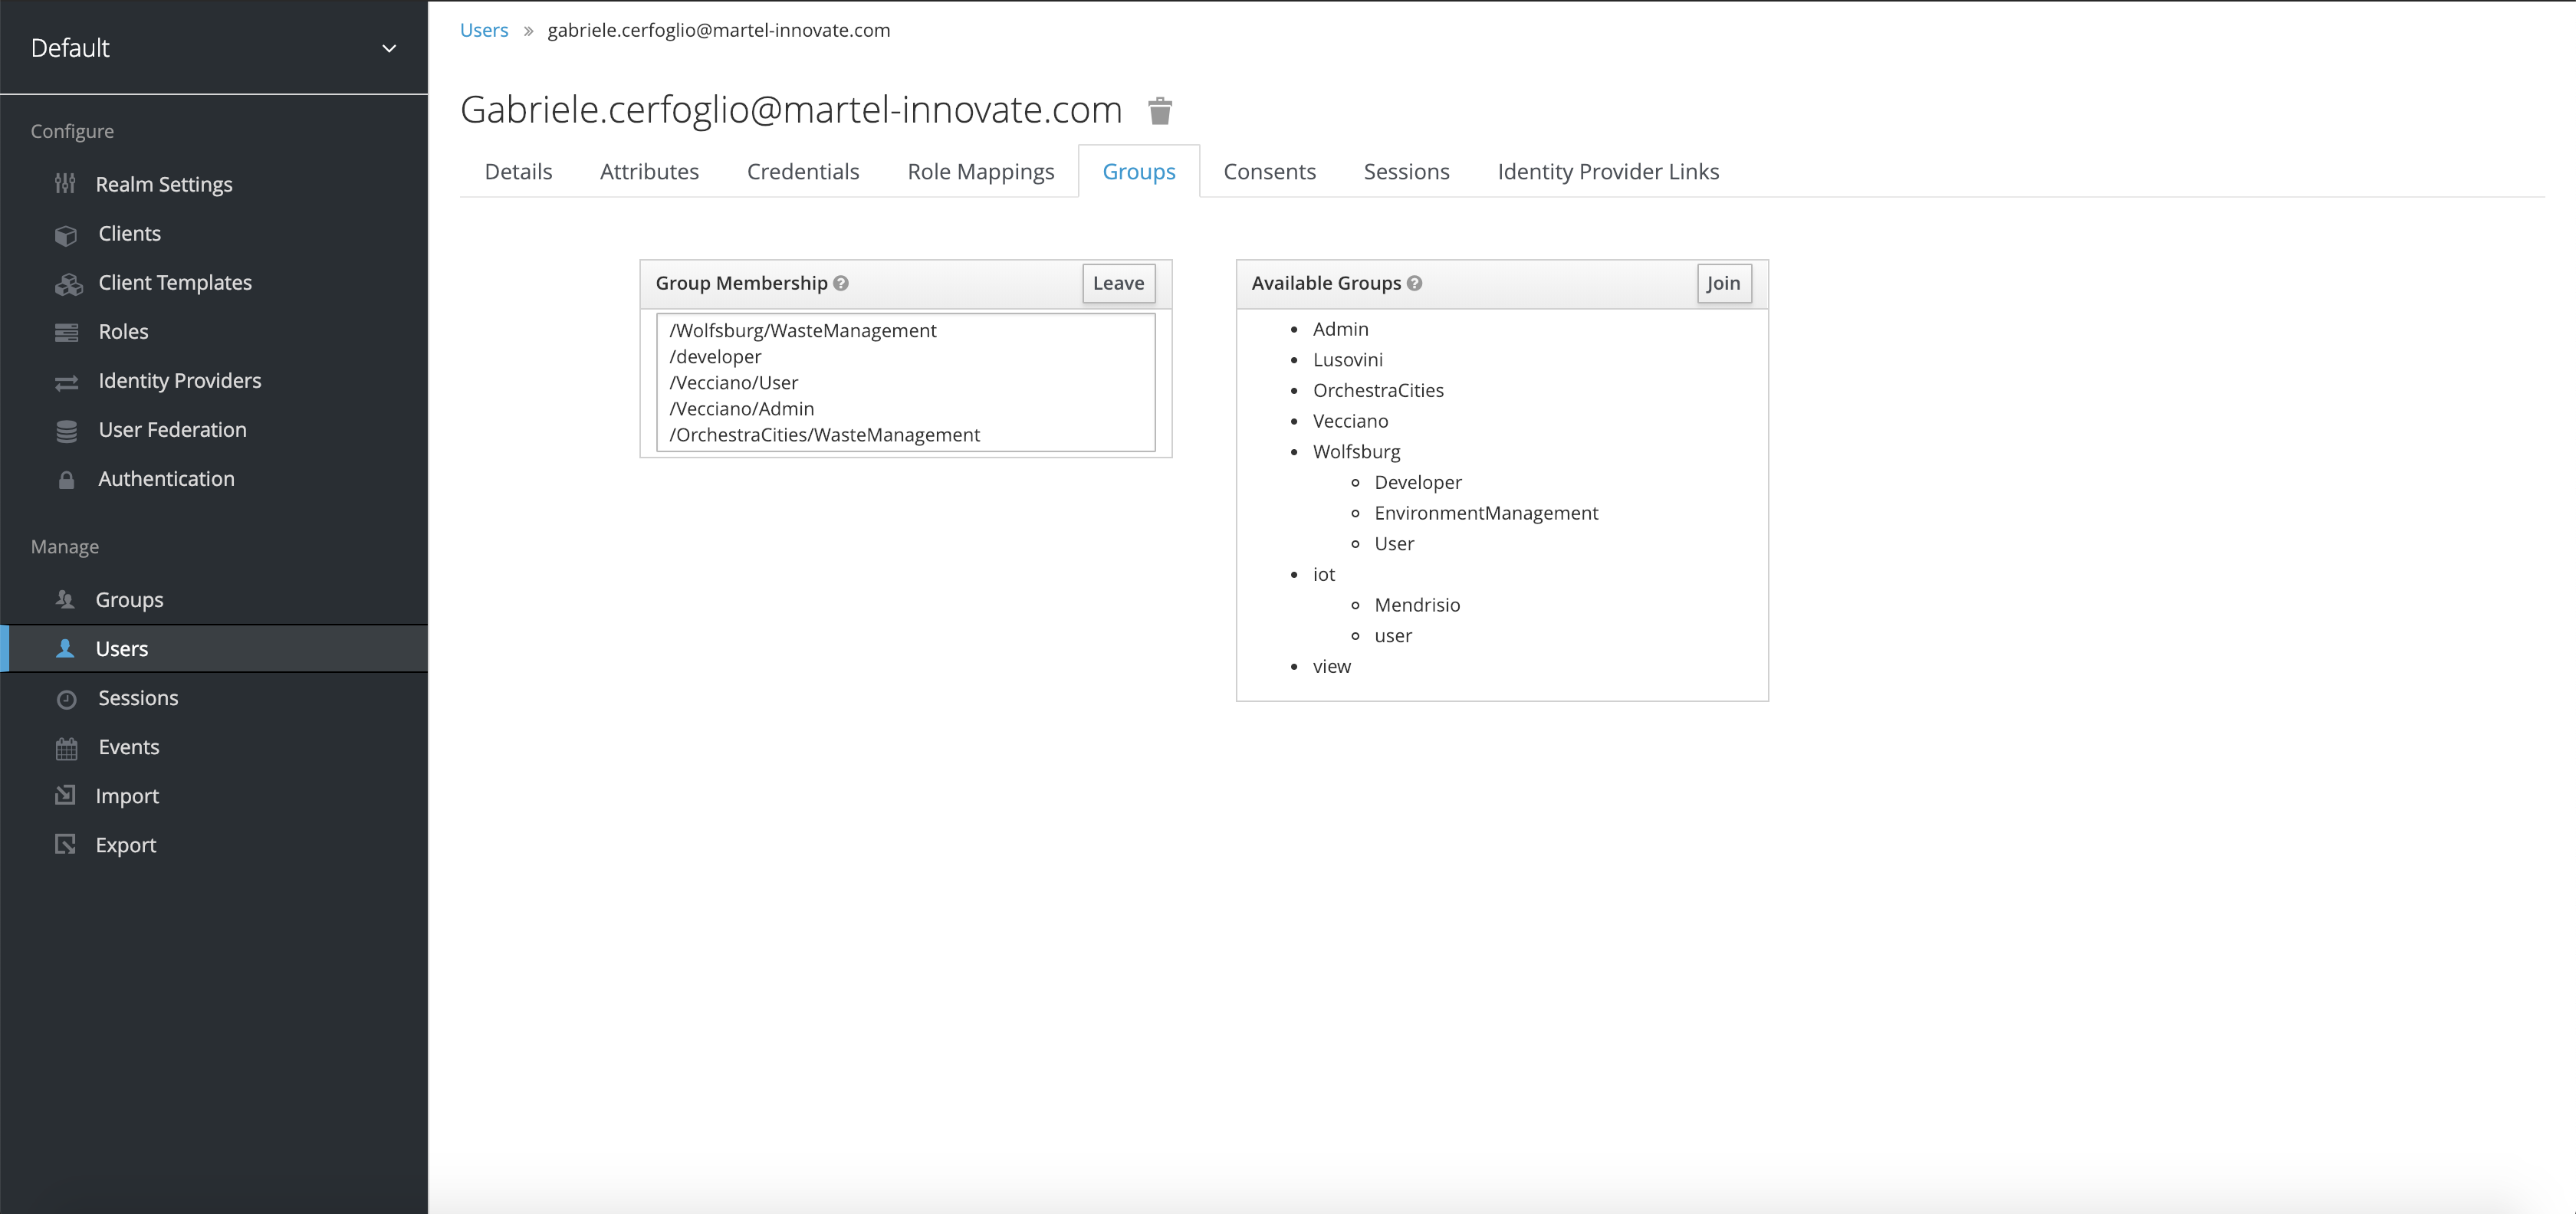
In order to give a User the Roles from the new User Group, and to give them permission for the new Service Group the User needs to become a member of those groups. To do this, select "Users" from the left sidebar. From this page, locate the User you want to alter by searching for its username, or click "View all users" and find it from the full list. Once found, click on their id on the leftmost column. On this new page, click on the "Groups" tab. You'll see a list Groups the User belongs to, and one of the available Groups for the User to join. Select the User Group and the Service Group you created under "OrchestraCities" and click on "Join". They should appear now under "Group Membership". The User is now member of those Groups. Removing a User from a Group can be done similarly by selecting the Group they belong to and clicking "Leave".
5.1.6 Create Groups and assign Roles and Users with the Portal#
As previously done when creating Users, log into the Portal and click on Admin, selecting Groups from the dropdown menu this time.
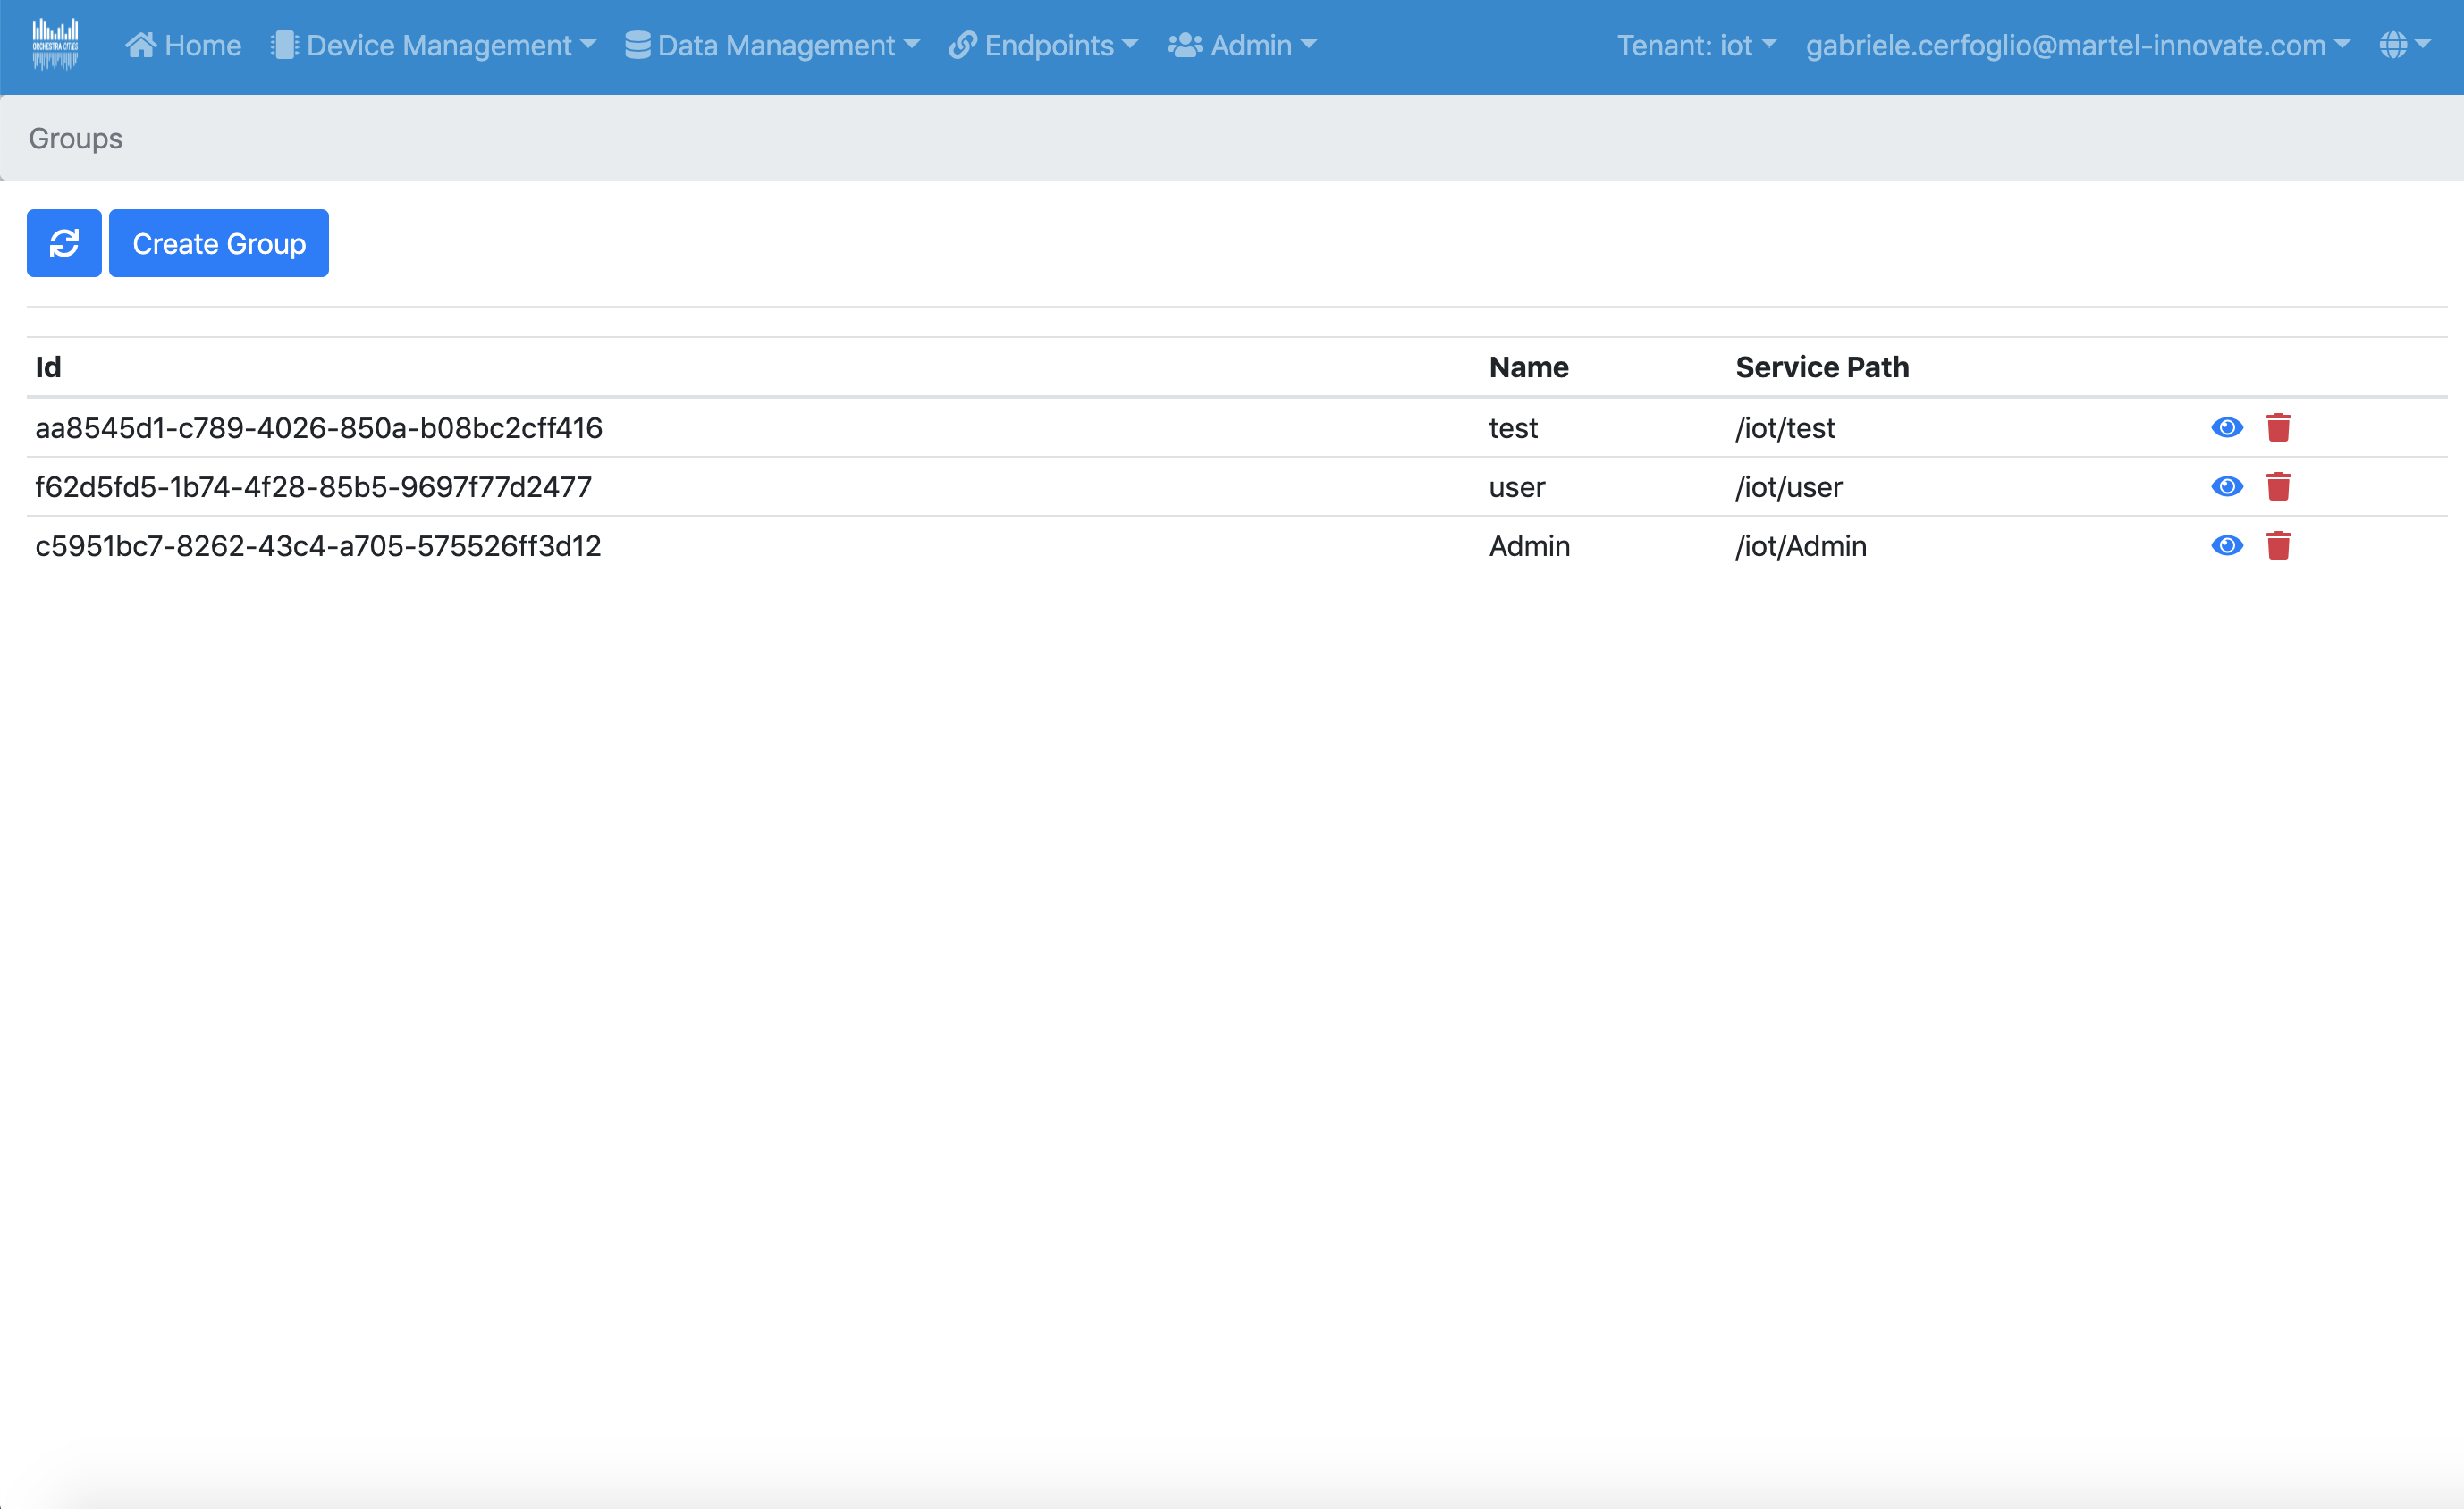
Clicking on Create Group will bring back a form to create a new Group, and assign to it the roles you want the Users belonging to it to have. Once created, clicking on the eye icon next to a Group's name will allow you to add Users to it by entering their username, and altering the roles if needed.
It's also possible to create Service Path Groups from the Admin/Service Paths section of the Portal. It can be done directly from that page, and Users can be added just as with the User Groups.
5.1.7 User API Authentication#
With the following token you will be able to authenticate to OC APIs.
The cloud hosted platform at the time being requires a client_secret, which
you need to obtain from OrchestraCities team.
-
Obtain a token with your email and password:
You will need to replace in the following command your
{{username}}, your{{password}}and the{{client_secret}}which you will find in theCredentialstab of theresource_serverclient in theClientslist of Keycloak's Admin Page.curl --request POST \ --url https://auth.s.orchestracities.com/auth/realms/default/protocol/openid-connect/token \ --header 'Content-Type: application/x-www-form-urlencoded' \ --data 'username={{username}}&password={{password}}&grant_type=password&client_id=resource_server&client_secret={{client_secret}}'Response:
{ "access_token": "eyJhbGciOiJSUzI1NiIsInR5cCIgOiAiSldUIiwia2l...", "expires_in": 36000, "refresh_expires_in": 3600, "refresh_token": "eyJhbGciOiJSUzI1NiIsInR5cCIg...", "token_type": "bearer", "not-before-policy": 0, "session_state": "849d007b-93b3-4a5d-87e8-653cd774485b" } -
Validate your token (to see that the token actually works fine):
You will need to replace in the following command your
{{client_secret}}and the{{access_token}}you received in the previous step.curl --request POST \ --url https://auth.s.orchestracities/auth/realms/default/protocol/openid-connect/token/introspect \ --header 'Content-Type: application/x-www-form-urlencoded' \ --data 'client_id=resource_server&client_secret={{client_secret}}&token={{access_token}}'Response:
{
    "jti": "a2a1231-4328-4328-b471-2e630d2553f",
    "exp": 1550258044,
    "nbf": 0,
    "iat": 1550222044,
    "iss": "https://auth.s.orchestracities.com/auth/realms/default",
    "aud": "resource_server",
    "sub": "f2845018-6218-4b22-83d6-8b26681367e4",
    "typ": "Bearer",
    "azp": "resource_server",
    "auth_time": 0,
    "session_state": "57edaf48-6e72-4860-9c37-cbf29f39d6e1",
    "name": "developer developer",
    "given_name": "developer",
    "family_name": "developer",
    "preferred_username": "[email protected]",
    "email": "[email protected]",
    "acr": "1",
    "fiware-services": {
        "OrchestraCities": [
            "/WasteManagement",
            "/ParkingManagement",
            "/MobilityManagement",
            "/EnvironmentManagement"
        ],
        "Wolfsburg": [
            "/WasteManagement",
            "/ParkingManagement",
            "/EnvironmentManagement"
        ]
    },
    "scope": [
      ...
    ],
    "client_id": "resource_server",
    "username": "[email protected]",
    "active": true
}
5.2 Getting Access to APIs#
Access to the APIS of the different services composing OrchestraCities is governed by the API Gateway, which is based on Gravitee
This is the tool used to manage the access to the APIS, for example through the
definition of access plans (and quotas on the number of requests per unit of
time). For this tutorial, you may want to request an apiKey for the services
being queried afterwards so as not to be bothered with reaching quota limits.
The final goal is to get an apiKey, which you will store in your Postman
configuration as explained in the beginning of this tutorial, or you'll use in
the curl commands to replace {{X-Gravitee-Api-Key}} when needed.
The process is quite similar for the different services (Orion, QuantumLeap, etc.) You need to follow these steps.
- Go to the API Gateway and login with your credentials.

-
Click on SEE ALL APIS and pick the api you want a key for
-
In this example, we chose Context Broker

- Scroll down a bit and click Subscribe to any plan that allows a reasonable number of requests for your need.

-
You will be asked to pick an application. You can use the Default application for now. Click Subscribe.
-
Someone (an administrator) will have to approve your request.
-
You will be notified when your request is approved, and you will be able to get your
apiKeyfrom the subscription part of the left menu.

5.3 Register a device#
5.3.1 Register a device using APIs#
In order to receive data from the devices, first you need to register the device
in the IoT Agent. For that, you need to create the device groups and the devices.
Device Groups are a simple way to provide a shared configuration among different
devices (also across multiple protocols).
First of all you should pick one of the protocols available in the platform.
You can query them using:
curl --request GET \
  --url https://api.s.orchestracities.com/iot/config/protocols/ \
  --header 'Authorization: Bearer {{token}}' \
  --header 'Content: application/json'
The response will look like:
{
    "count": 3,
    "protocols": [
        {
            "__v": 0,
            "_id": "5aa28f51bf77b0d245058c35",
            "description": "OMA LWM2M IoT Agent COAP protocol (Node.js version)",
            "protocol": "COAP",
            "resource": "/iot/d"
        },
        {
            "__v": 0,
            "_id": "5c6715da1794d4000e790d82",
            "description": "Ultralight 2.0 IoT Agent (Node.js version) supports HTTP/MQTT/AMQP protocols",
            "protocol": "UL",
            "resource": "/iot/ul"
        },
        {
            "__v": 0,
            "_id": "5c671c811794d4000e790dbf",
            "description": "JSON IoT Agent (Node.js version) supports HTTP/MQTT/AMQP protocols",
            "protocol": "JSON",
            "resource": "/iot/json"
        }
    ]
}
In the following we use the UL Agent as example. Similarly you will be able to use other available protocols. Be aware that the OC cloud instance, compared to official FIWARE IoT Agents, poses some restrictions:
- Device Group
keyis automatically computed, thus, if you inject it, it will be replaced. - Resource is automatically computed as well, based on the
protocolselected, e.g. forULprotocol, the resource would be/iot/ul. - In the cloud platform,
cbrokeris not supported, since the platform allows agents to communicate only with the context broker offered by the platform.
5.3.1.1 Device Groups Operations#
To interact with a specific protocol, you will need to used the protocol
parameter to every call.
5.3.1.1.1 Create#
curl -X POST \
  https://api.s.orchestracities.com/iot/config/services?protocol=UL \
  -H 'Authorization: Bearer {{token}}' \
  -H 'Cache-Control: no-cache' \
  -H 'Content-Type: application/json' \
  -H 'Fiware-Service: OrchestraCities' \
  -H 'Fiware-ServicePath: /WasteManagement' \
  -H 'X-Gravitee-Api-Key: {{X-Gravitee-Api-Key}}' \
  -d '{
    "services": [
       {
         "entity_type": "WasteContainer",
       "internal_attributes": [],
       "attributes": [
           {
               "type": "Number",
               "name": "temperature",
               "object_id": "t"
           },
           {
               "type": "geo:point",
               "name": "location",
               "object_id": "l"
           },
           {
               "type": "Text",
               "name": "description",
               "object_id": "d"
           },
           {
               "type": "Text",
               "name": "status",
               "object_id": "S"
           },
           {
               "type": "Number",
               "name": "proximity",
               "object_id": "p"
           },
           {
               "expression": "${(@deviceHeight - @proximity) / @deviceHeight}",
               "type": "Number",
               "name": "fillingLevel",
               "object_id": "fillingLevel"
           }
       ],
       "lazy": [],
       "static_attributes": [
           {
               "value": "160",
               "type": "Number",
               "name": "deviceHeight"
           },
           {
               "name": "simulated",
               "type": "Boolean",
               "value": "false"
           }
       ],
       "commands": []
       }
    ]
}'
This request creates the Device Group for the Waste devices. For the Parking
devices you must update the value of entity_type to ParkingSpot and the
Fiware-ServicePath to ParkingManagement.
5.3.1.1.2 Update#
To update a Service Group, you need to know its key:
curl -iX PUT \
  'https://api.s.orchestracities.com/iot/config/services?apikey=T3JjaGVzdHJhQ2l0aWVzOi9XYXN0ZU1hbmFnZW1lbnQ6V2FzdGVDb250YWluZXI6MQ==&protocol=UL' \
  -H 'Authorization: Bearer {{token}}' \
  -H 'Cache-Control: no-cache' \
  -H 'Content-Type: application/json' \
  -H 'Fiware-Service: OrchestraCities' \
  -H 'Fiware-ServicePath: /WasteManagement' \
  -H 'X-Gravitee-Api-Key: {{X-Gravitee-Api-Key}}' \
  -d '{
  "entity_type": "WasteContainerUpdate"
}'
This request will update the value for the field entity_type for the service
group with apikey T3JjaGVzdHJhQ2l0aWVzOi9XYXN0ZU1hbmFnZW1lbnQ6V2FzdGVDb250YWluZXI6MQ== for the specified Fiware-Service and Fiware-ServicePath.
3. Delete#
Similarly, to delete a Device Group:
curl -X DELETE \
  'https://api.s.orchestracities.com/iot/config/services?apikey=T3JjaGVzdHJhQ2l0aWVzOi9XYXN0ZU1hbmFnZW1lbnQ6V2FzdGVDb250YWluZXI6MQ==&protocol=UL' \
  -H 'Authorization: Bearer {{token}}' \
  -H 'Cache-Control: no-cache' \
  -H 'Fiware-Service: OrchestraCities' \
  -H 'Fiware-ServicePath: /WasteManagement' \
  -H 'X-Gravitee-Api-Key: {{X-Gravitee-Api-Key}}' \
More operations (and examples) related with the services groups can be found here.
5.3.1.2 Devices Operations#
Device creation works in a similar way. Devices are coupled to the Device Group,
based on Fiware-Service and Fiware-ServicePath and entity_type.
5.3.1.2.1 Create#
curl -X POST \
  'https://api.s.orchestracities.com/iot/config/devices?protocol=UL \
  -H 'Authorization: Bearer {{token}}' \
  -H 'Cache-Control: no-cache' \
  -H 'Content-Type: application/json' \
  -H 'Fiware-Service: OrchestraCities' \
  -H 'Fiware-ServicePath: /WasteManagement' \
  -H 'X-Gravitee-Api-Key: {{X-Gravitee-Api-Key}}' \
  -d '{
    "devices": [
       {
         "device_id":   "waste001",
         "entity_name": "urn:ngsd-ld:Waste:001",
         "entity_type": "WasteContainer"
       }
     ]
}'
It is recommended not to used name with spaces or weird characters, this may not be supported by orion or may be complex to query since will require you to used URI encoding.
5.3.1.2.2 Update#
To update a device:
  curl -iX PUT \
  'https://api.s.orchestracities.com/iot/config/devices/waste001?protocol=UL' \
  -H 'Authorization: Bearer {{token}}' \
  -H 'Cache-Control: no-cache' \
  -H 'Content-Type: application/json' \
  -H 'Fiware-Service: OrchestraCities' \
  -H 'Fiware-ServicePath: /WasteManagement' \
  -H 'X-Gravitee-Api-Key: {{X-Gravitee-Api-Key}}' \
  -d '{
    "entity_type": "IoT-Device"
  }'
5.3.1.2.3 Delete#
curl -iX DELETE \
  'https://api.s.orchestracities.com/iot/config/devices/waste001?protocol=UL' \
  -H 'Authorization: Bearer {{token}}' \
  -H 'Fiware-Service: OrchestraCities' \
  -H 'Fiware-ServicePath: /WasteManagement' \
  -H 'X-Gravitee-Api-Key: {{X-Gravitee-Api-Key}}' \
More operations (and examples) related with the devices can be found here.
5.3.2 Register a device using UI#
To register a new Device, log once again into the Portal . From the top navigation bar select "Device Groups" under "Device Management"

Next to a Device Group there are 4 icons. From left to right they allow the user to view more details of the group, see the Devices registered under it, edit the group, and delete the group. Select the second icon next to the group you want to create a Device under. Alternatively, you can select "New Device Group" at the top to create a new Group.
Clicking the second icon will bring up the list of Devices registered under that particular group.
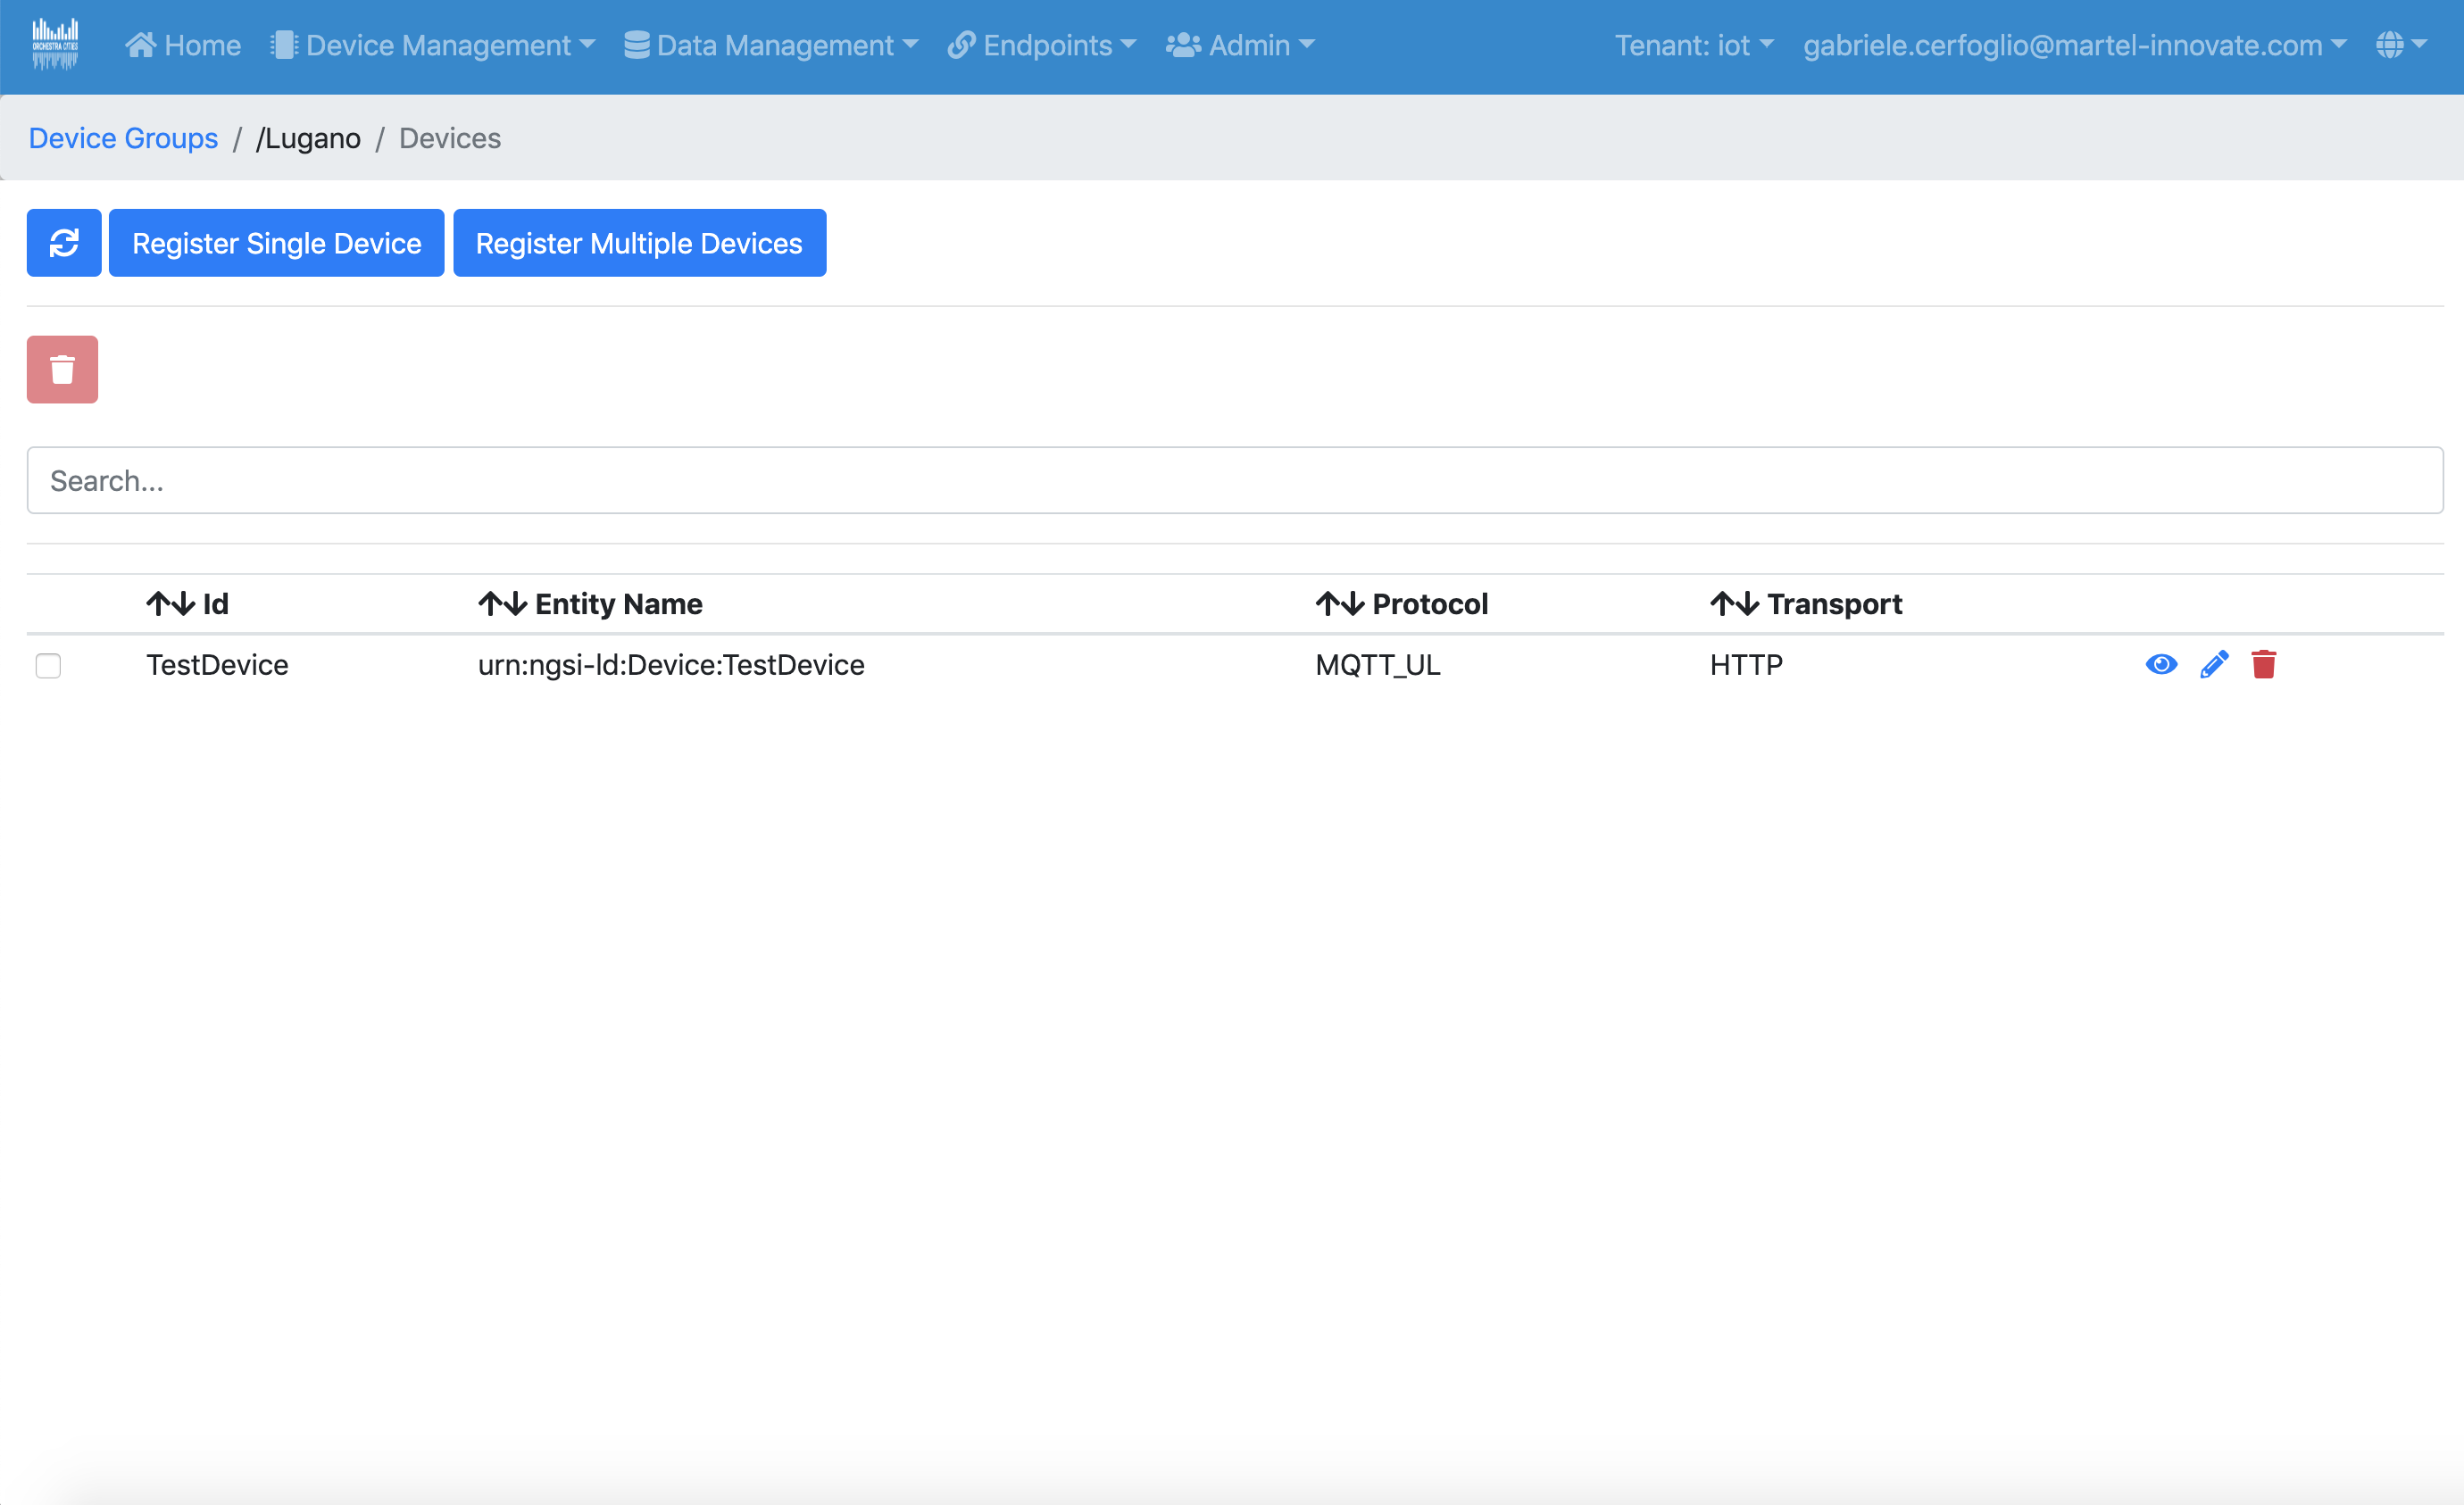
You have the option to register a single new Device, or multiple Devices in bulk using a configuration file listing them. For now, select "Register single Device".
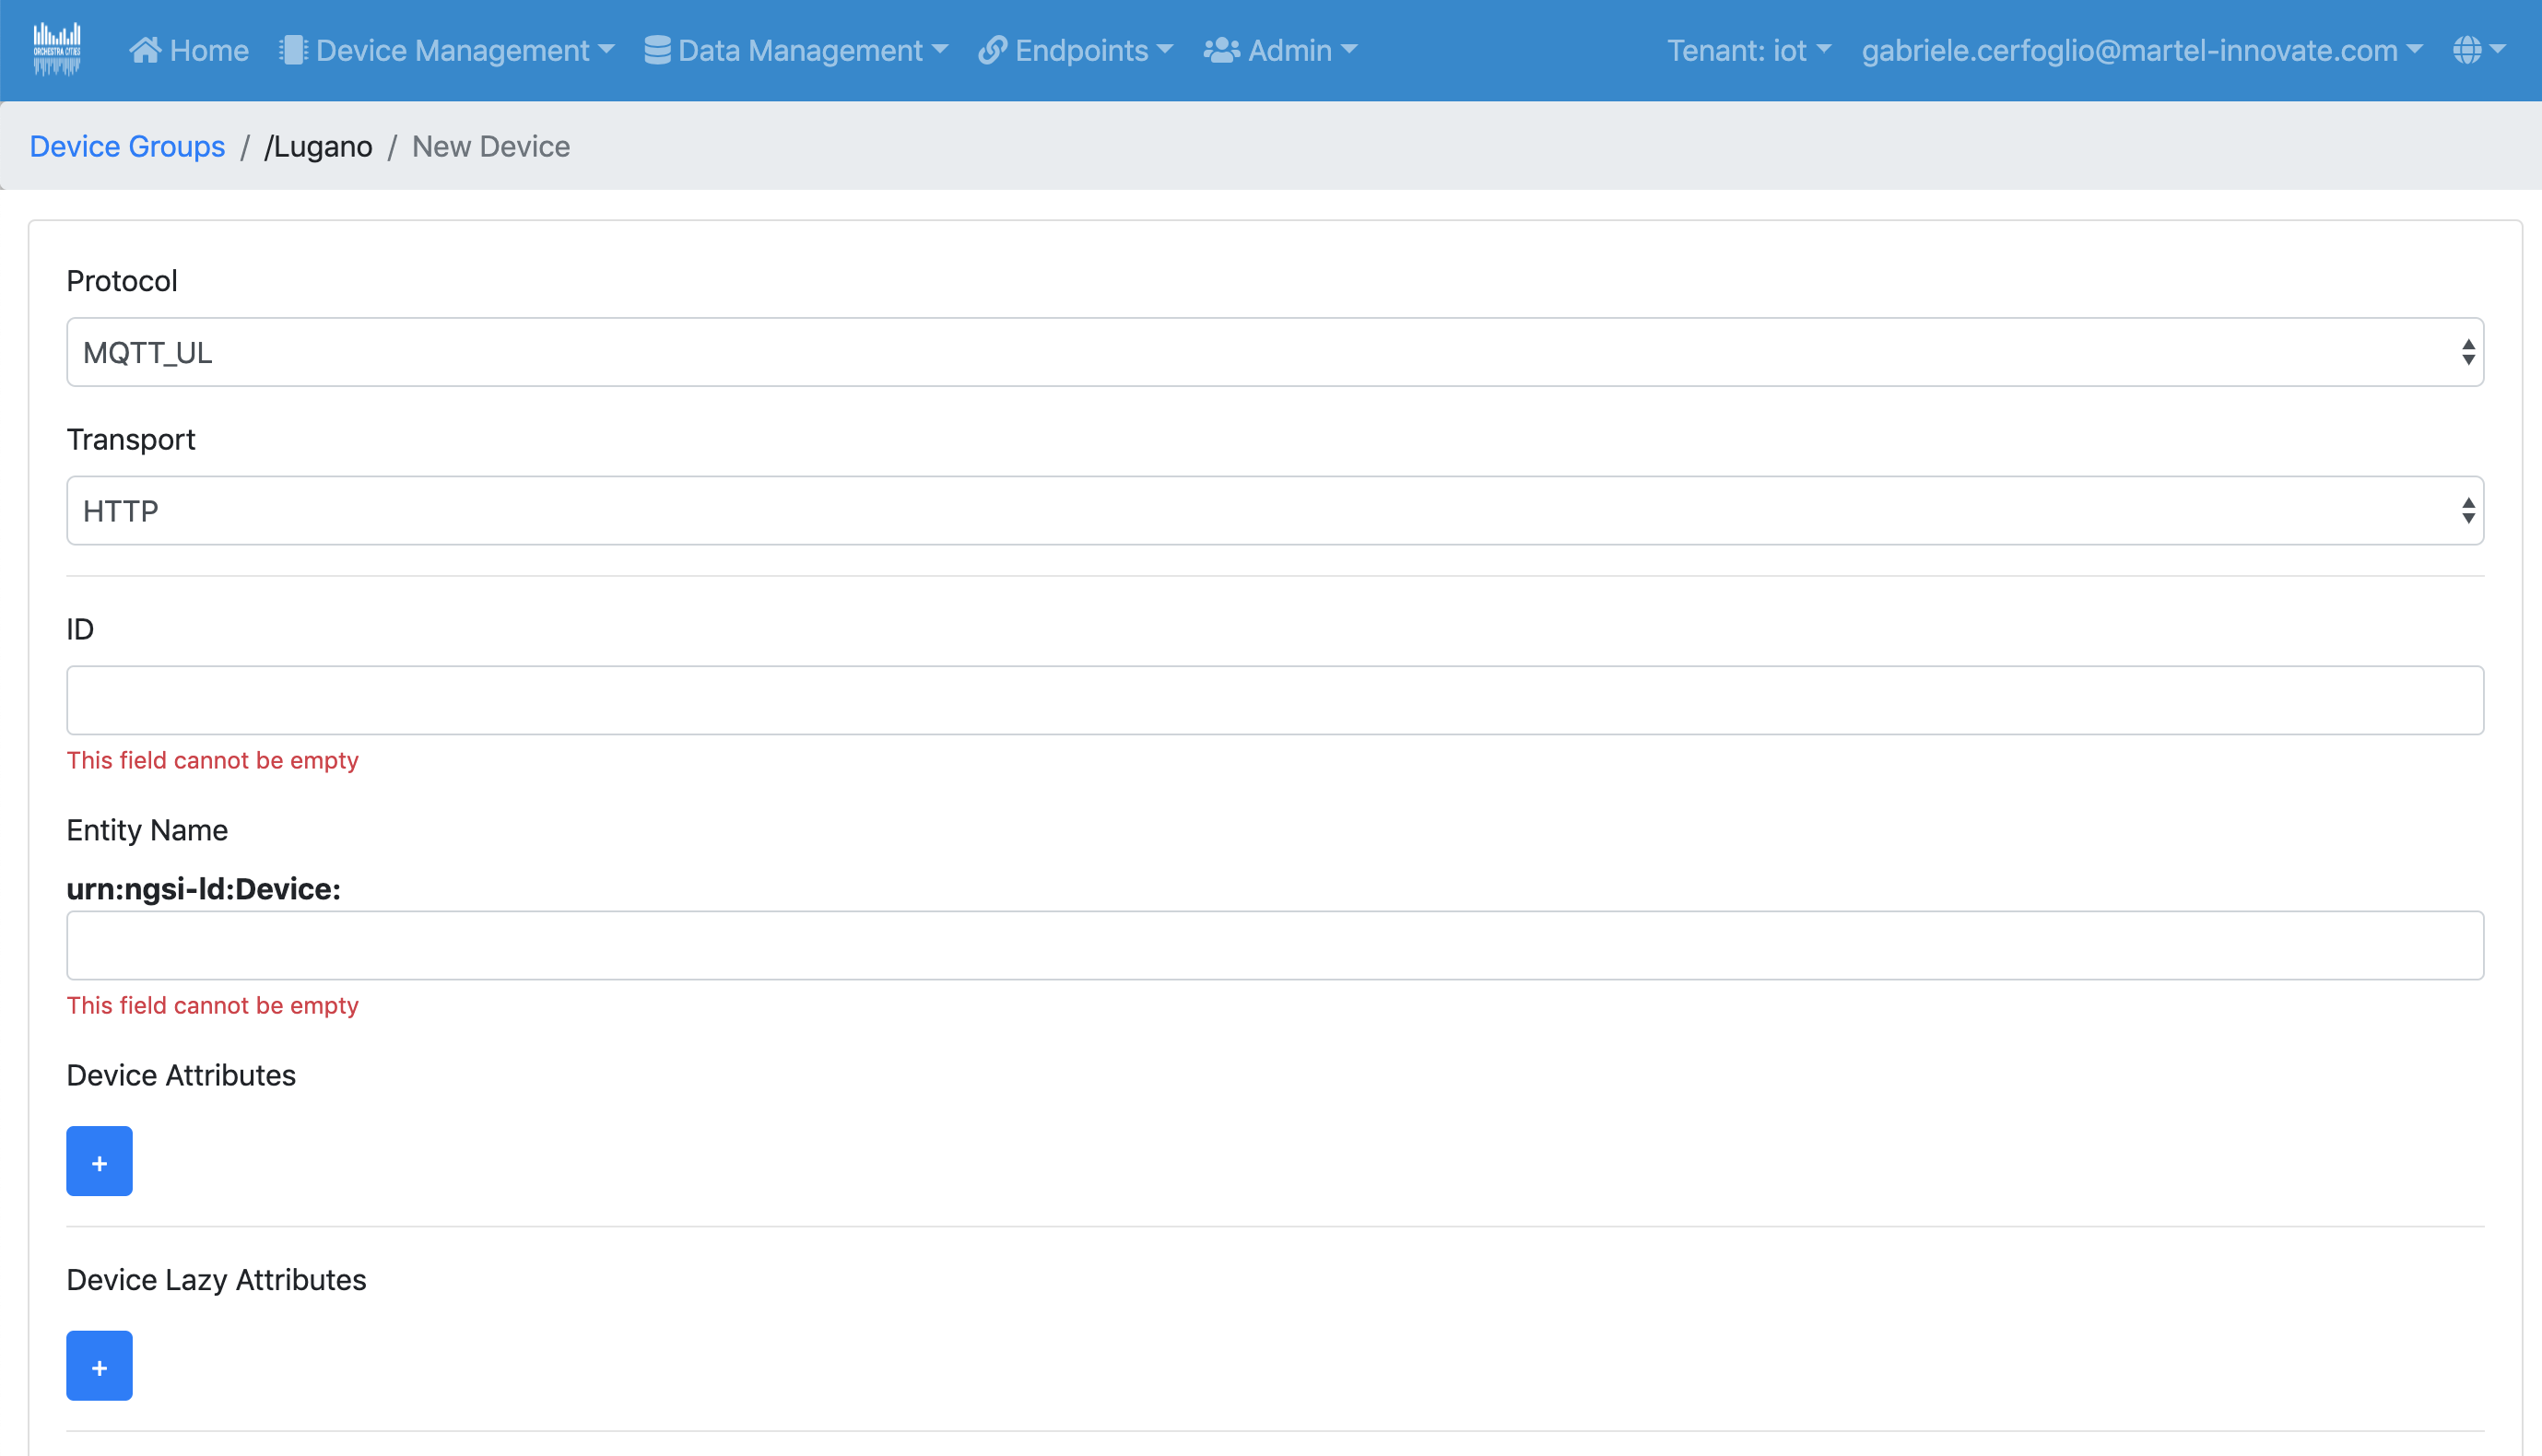
In the new Device form fill in the information for the Device you're registering and click submit. Note that not all fields are mandatory, but make sure all required fields are filled in correctly.
Your newly registered Device should now be visible in the Devices list upon successful creation. If an error occurs, make sure your fields are filled in properly.
5.4 Data Management#
The entry point for any data management activity (other options may be possible,
but are not recommended for "live data"), is Orion Context Broker.
A publish subscribe middleware handling data generated by devices.
The data format supported by Orion is NGSI v2.
Each entity, i.e. instance of a specific data set, is
described using JSON. The FIWARE Community defined a set of data models for
different tasks (the models are documented
here).
In the following you can find an example for ParkingSpot entity.
{
    "id": "santander:daoiz_velarde_1_5:3",
    "type": "ParkingSpot",
    "name": "A-13",
    "location": {
        "type": "Point",
        "coordinates": [-3.80356167695194, 43.46296641666926]
    },
    "status": "free",
    "category": ["onstreet"],
    "refParkingSite": "santander:daoiz_velarde_1_5"
}
More information about NGSI data models are available as part of the NGSI v2 specification.
It is important to highlight that an NGSI Context Broker supports only
last point in time of a given data. I.e. the current status of
the ParkingSpot, if we link to the previous example.
This means that to store the historical records of a given data set (e.g. the
different values in different point in time of the attributes of the entity
ParkingSpot with id santander:daoiz_velarde_1_5:3), we need
to leverage another component. In this case the feature is provided the
Quantum Leap Timeseries API.
The storage of data in Quantum Leap leverages NGSI subscriptions. By creating a subscriptions in Context Broker, we can record, each time an entity is updated, its values in Quantum Leap. I.e. store a time series of entities values.
For example, to record in Quantum Leap all the updates of entities of type
ParkingSpot, we would use a subscription as follows:
{
    "description": "ParkingSpot subscription",
    "subject": {
        "entities": [
        {
            "idPattern": ".*",
            "type": "ParkingSpot"
        }
        ],
        "condition": {
            "attrs": []
        }
    },
    "notification": {
        "http": {
            "url": "https://api.s.orchestracities.com/timeseries/v2/notify"
        },
        "attrs": [],
        "metadata": ["dateCreated", "dateModified"]
    },
    "throttling": 5
}
Details on the specification of the subscription payload are discussed in Orion Context Broker documentation and in NGSI v2 spec.
Similarly, should we wish to "forward" any data received from Context Broker to another service, we should create a subscription.
Note: If you send data to Context Broker before creating a subscription, data sent before the creation are not persisted in Quantum Leap (or any other service).
5.4.1 Alignment with FIWARE Data Models#
While in principle it is possible to store any data model in Orion, it is highly recommended to leverage FIWARE Data Models. Leveraging standardised data models ensures that different cities produce easy to re-use data. The benefit of this approach is that applications and services build on top of such models are easy to be re-used on different cities.
Of course, your application may need additional models or slight modifications to existing models. In case we recommend to contribute your additions and changes and discuss them with the community as discussed in the HOW TO USE FIWARE HARMONISED DATA MODELS IN YOUR PROJECTS section.
5.4.2 Querying Context Data#
5.4.2.1 Querying Context Data from the UI#
Querying entities from the Context Broker can be done from the Portal's UI. Log in the Portal with your Keycloak credentials, and from the navbar on the home page select "Entities" under "Data Management".
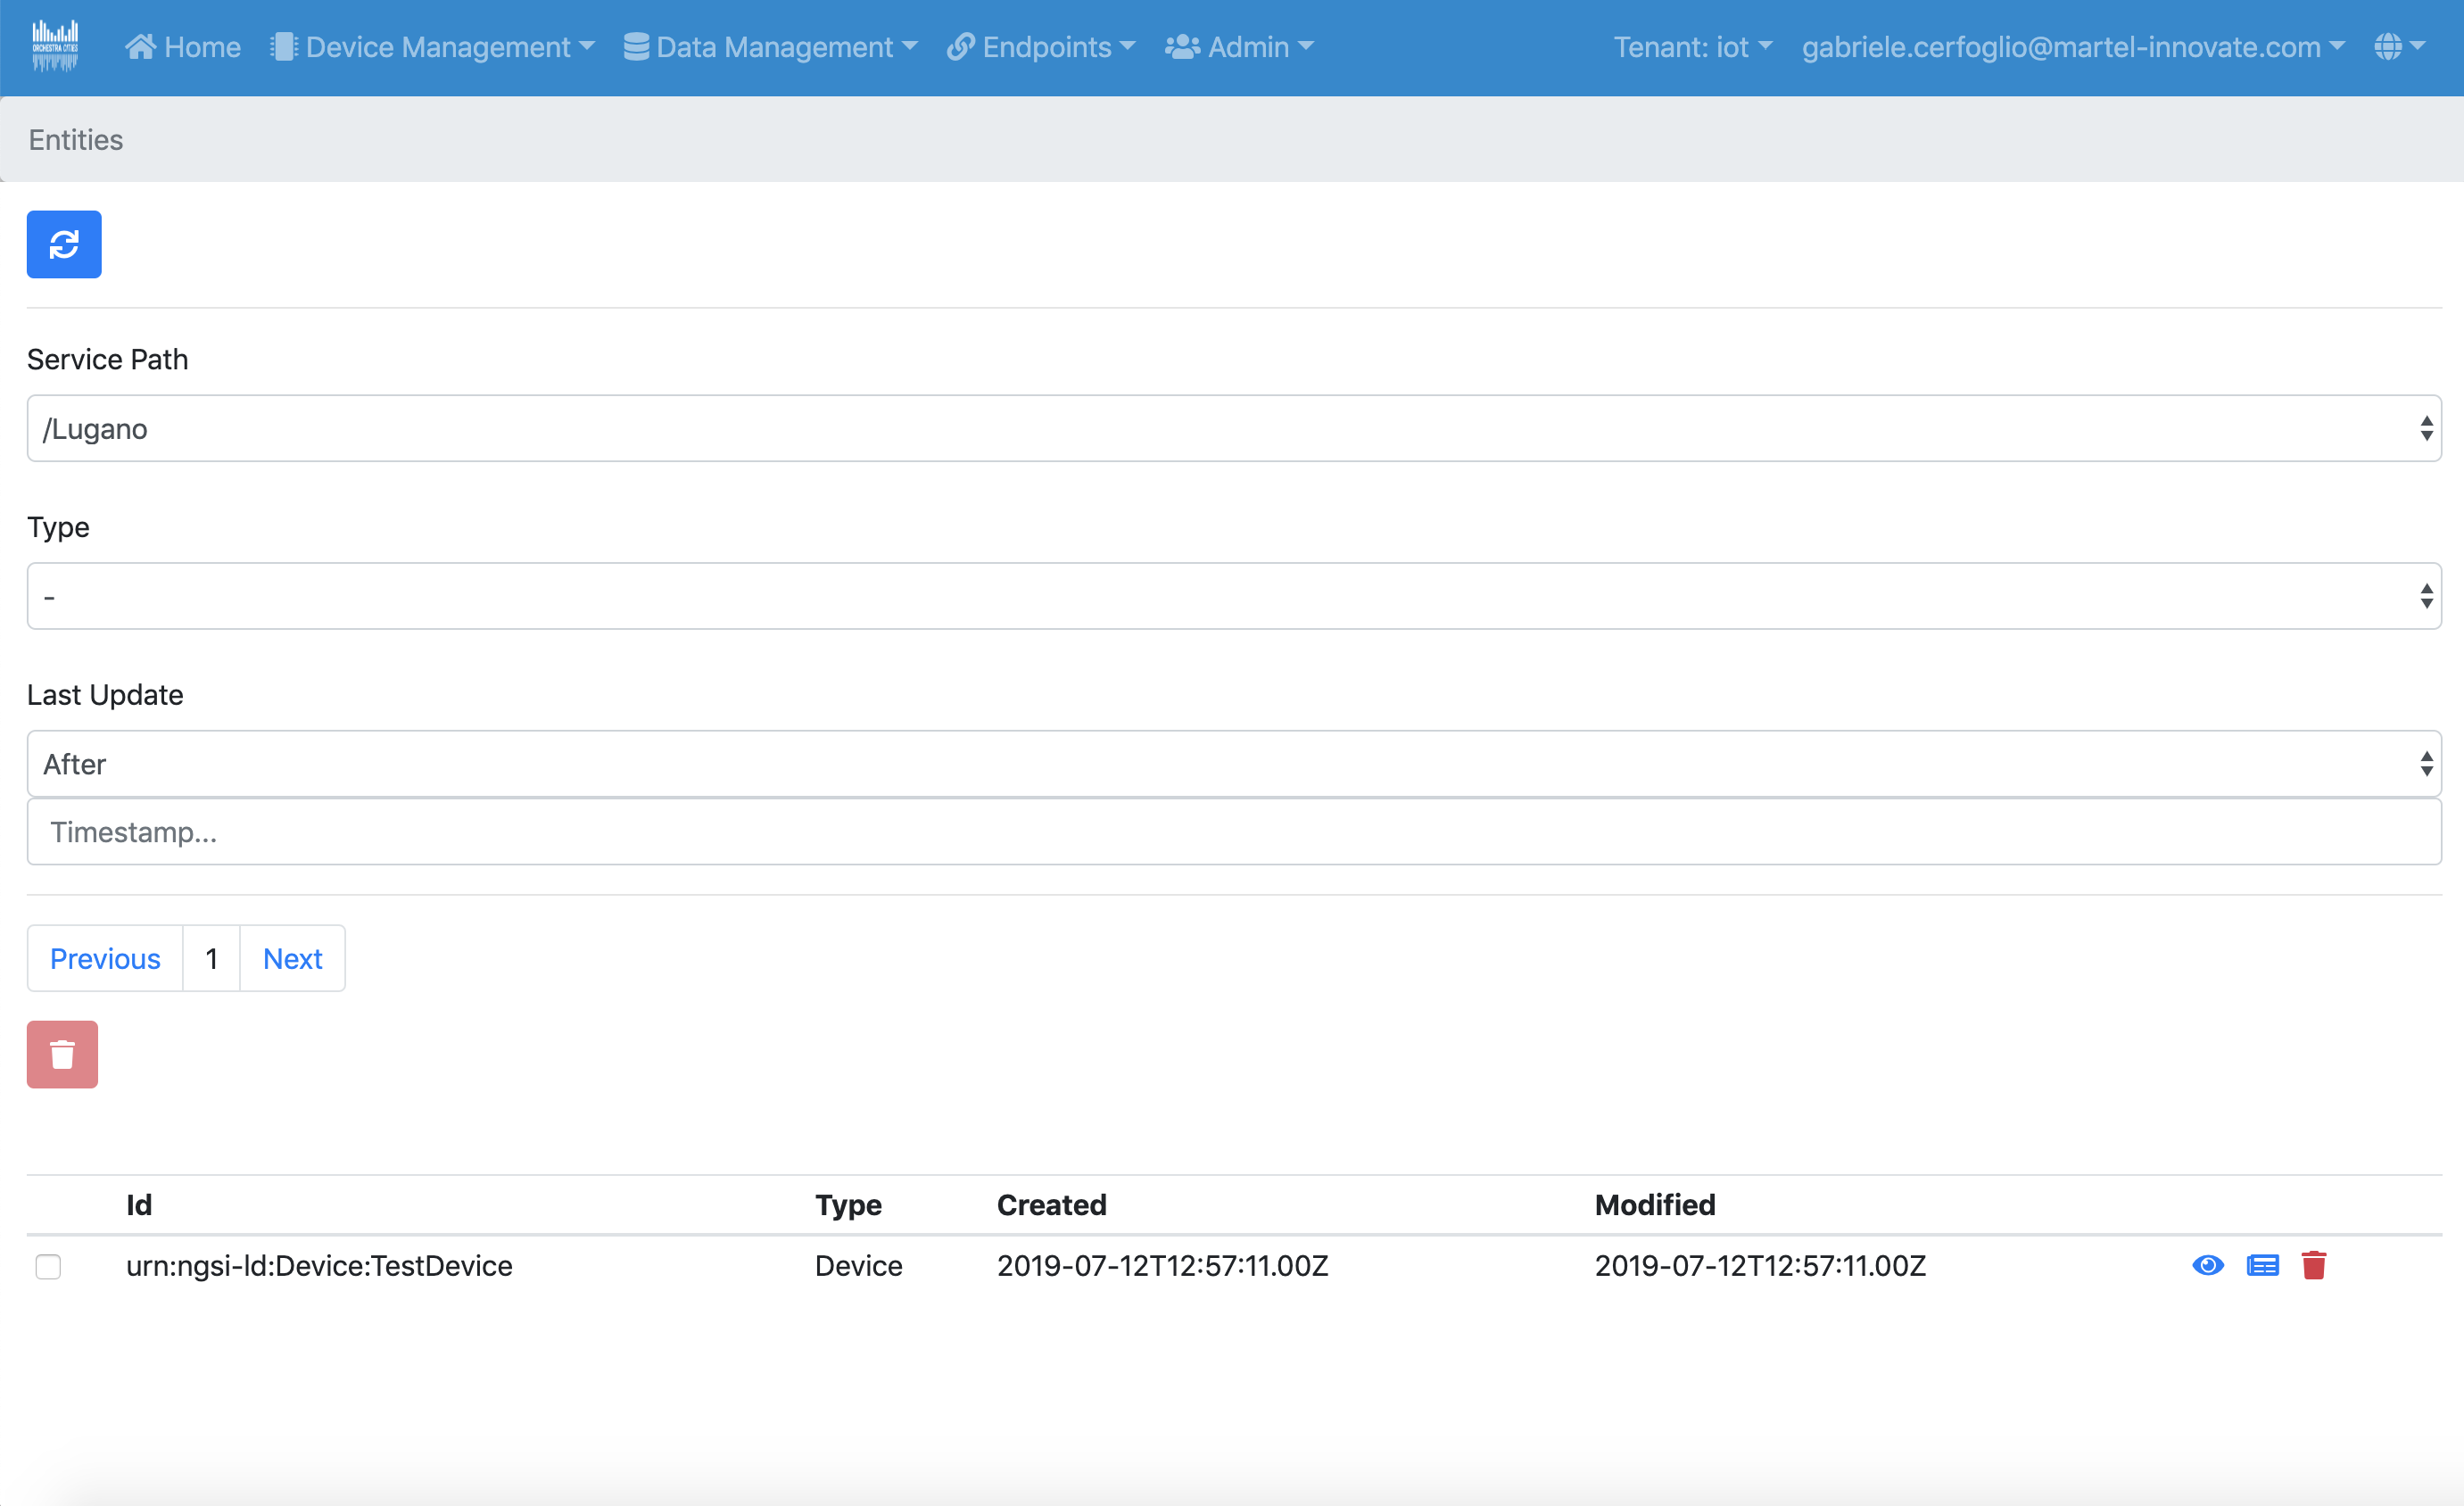
From there, you'll be able to see all entities under the currently selected tenant, and filter by entity types and service paths (used by the device groups). You can also filter entities by their last update timestamps. A small warning icon will be visible next to an entities if they haven't received any new updates in a while (by default 24 hours). Clicking on the eyeball icon next to an Entity will bring up detailed info about it, as well as allowing you to see the most recent historical data for an attributes.
5.4.2.2 Querying Context Data from the API#
-
To query context data, you will need to get a token (and an api key if you need to run many queries).
-
With your
{{access_token}}and your{{apiKey}}, you can list all entities in a given Tenant (fiware-Service) and Service Group (fiware-ServicePath):curl --request GET \ --url https://api.s.orchestracities.com/context/v2/entities \ --header 'Authorization: Bearer {{access_token}}' \ --header 'Content: application/json' \ --header 'X-Gravitee-Api-Key: {{apiKey}}' \ --header 'Fiware-Service: OrchestraCities' \ --header 'Fiware-ServicePath: /ParkingManagement' -
Or access a specific entity in a given Tenant (
fiware-Service) and Service Group (fiware-ServicePath):curl --request GET \ --url https://api.s.orchestracities.com/context/v2/entities \ --header 'Authorization: Bearer {{access_token}}' \ --header 'Content: application/json' \ --header 'X-Gravitee-Api-Key: {{apiKey}}' \ --header 'Fiware-Service: OrchestraCities' \ --header 'Fiware-ServicePath: /ParkingManagement'
For more information on context broker apis, refer to the official Orion Context Broker documentation, or its step-by-step tutorial.
5.4.3 Querying Historical Data#
-
To query historical context data, you will need to get a token (and an api key if you need to run many queries).
-
With your
{{access_token}}and your{{apiKey}}, you can list all records of an entity attribute () in a given Tenant (fiware-Service) and Service Group (fiware-ServicePath):curl --request GET \ --url https://api.s.orchestracities.com/context/v2/entities/urn:ngsi-ld:AirQualityObserved:lugano-2689/attrs/PM25?fromDate=2019-01-01T00:00:00&toDate=2019-03-01T00:00:00 \ --header 'Authorization: Bearer {{access_token}}' \ --header 'Content: application/json' \ --header 'X-Gravitee-Api-Key: {{apiKey}}' \ --header 'Fiware-Service: OrchestraCities' \ --header 'Fiware-ServicePath: /ParkingManagement'
For more information on QuantumLeap, the component in OrchestraCities handling historical context data, refer to the official QuantumLeap documentation, or its step-by-step tutorial.
5.5 Importing data from external source#
As early mentioned, the entry point for any data management activity is usually the Orion Context Broker. Importing data from external sources can be done in different ways. It is important to keep in mind that the platform is currently focused on real time data from APIs or sensors. This implies that importing "static" data, it is currently supported via some work around.
5.5.1 Which approach to use to import a different type of data?#
The rule of thumb could be the following:
-
In case of dynamic data (i.e. data that relates to entities evolving over time), it is recommended to inject them via the Context Broker. In this way, the latest value will be in the Context Broker, and historical values (eventually) in QuantumLeap.
-
In case the data to be imported represent sensors, it would be ideal to import such data via the IoT Agent framework. This may not necessarily mean to develop your own IoT Agent (which is anyhow possible via IoT Agent Node Library). An easy alternative would be to perform the integration at the level of the IoT Agent payload API (for example using the UL with HTTP transport, or the JSON IoT Agent with HTTP transport). The advantages of this solution are:
- ability to describe sensors within the FIWARE framework;
- ability to change from the IoT Agent API the data mapping between sensor data and entities;
- ability to manage static data related to the sensor as part of the IoT Agent configuration;
- ability to leverage IoT Agent expression;
Data will be then registered by the IoT Agent into Context Broker, and eventually, to QuantumLeap.
-
In case of static data (i.e. data that relates to entities not evolving over time), it is recommended to inject them only in the the Context Broker. (May be of use storing them in QuantumLeap if you want to query them in Grafana, but other than that, it would not make sense).
-
In case of historical data (i.e. data that pertains evolution of an entity in the past), it is recommended to inject them directly in QuantumLeap. Eventually, only the last point in time should be stored in Context Broker. Passing by Context Broker to store multiple time series, may be quite an overhead.
As mentioned above, it is highly recommended to leverage FIWARE Data Models.
5.5.2 Which tools to use to import data?#
FIWARE Community, over time, developed different solutions. You can search for them in GitHub and other FIWARE community related fora.
Here are the recommendations from Orchestra Cities:
-
In case high throughput is required, it is in generally better to develop a custom python data manipulation script.
-
In case high throughput is not a priority, Apache NIFI or Stream Sets Data Collector are good options.
5.5.3 Example of Data Collector to Import a CSV File from CKAN#
Here we shortly explain an example pipeline we created to import data
from a CSV file into Orion. Data imported are mapped to the PointOfInterest
data model. You can find the example ready to be customised here.

-
The first stage of the pipeline retrieves the data using http and defines the data format of the retrieved file. In this case a CSV using
;as delimiter. To do that we use an origin stage of typeHTTP Client.
-
The second stage of the pipeline, converts the CSV records to the NGSI data structure for the
PointOfInterestdata model. A processor stage of typeExpression Evaluatoris performing the task. Understanding expressions and related function of Data Collector is quite important to use this processor. For example, to create aStructuredValuein the JSON, we need first to create and empty map (using${emptyMap()}) and then map the each attribute of the map to its value (e.g./location/typemaps toPoint). Similarly for arrays, we need first to create and empty list (using${emptyList()}) and then map the each array index to its value (e.g./location/coordinates[0]maps to${record:value('/LAT')}).
Note: unfortunately at this stage there is no way to cast the value to a different type from the one derived from the CSV (text). So this has to be done using a processor stage of type
Field Type Converter. -
The third stage of the pipeline, removes unneeded fields from the CSV import. A processor stage of type
Field Removeris performing the task.
-
The forth stage of the pipeline, convert types of fields as needed using a processor stage of type
Field Type Converter.
-
The forth stage of the pipeline, normalise the NGSI representation (this is required to use batch operations on Orion) using a processor of type
Java Script. The normalisation is the process to attach fields type to the data values.
-
The last stage of the pipeline, send data to the Orion Context broker using a destination of type
Http Client. In here we use the batch operation/v2/op/update. This approach is recommended to avoid the need to differentiate the call to Orion for creating or updating data. With this operation we need just to useappendasactionTypein the communication with the Orion end point.
5.5.3.1 Tips#
-
Use the preview icon and click on the stage to see how data are manipulated.
-
Before testing against the actual APIs, use a mockup service su as WireMock to ensure that the send payload are the ones you expect. MockLab offers also a cloud instance of WireMock.

5.6 Creating Dashboards#
For the dashboards creation, we use Grafana. The dynamic nature of dashboards and their composition with elements such as graphs and panels enables a wide range of customisation.
To get started, you need to log in the dashboards interface with your credentials and follow these steps.
5.6.1 Create datasource#
The datasource represents the incoming data that will be used to feed the dashboards. To create a new data source you need to:
- Access the Data Sources section present in the Configuration panel. It will open a section where you can manages all the data sources and add new ones.
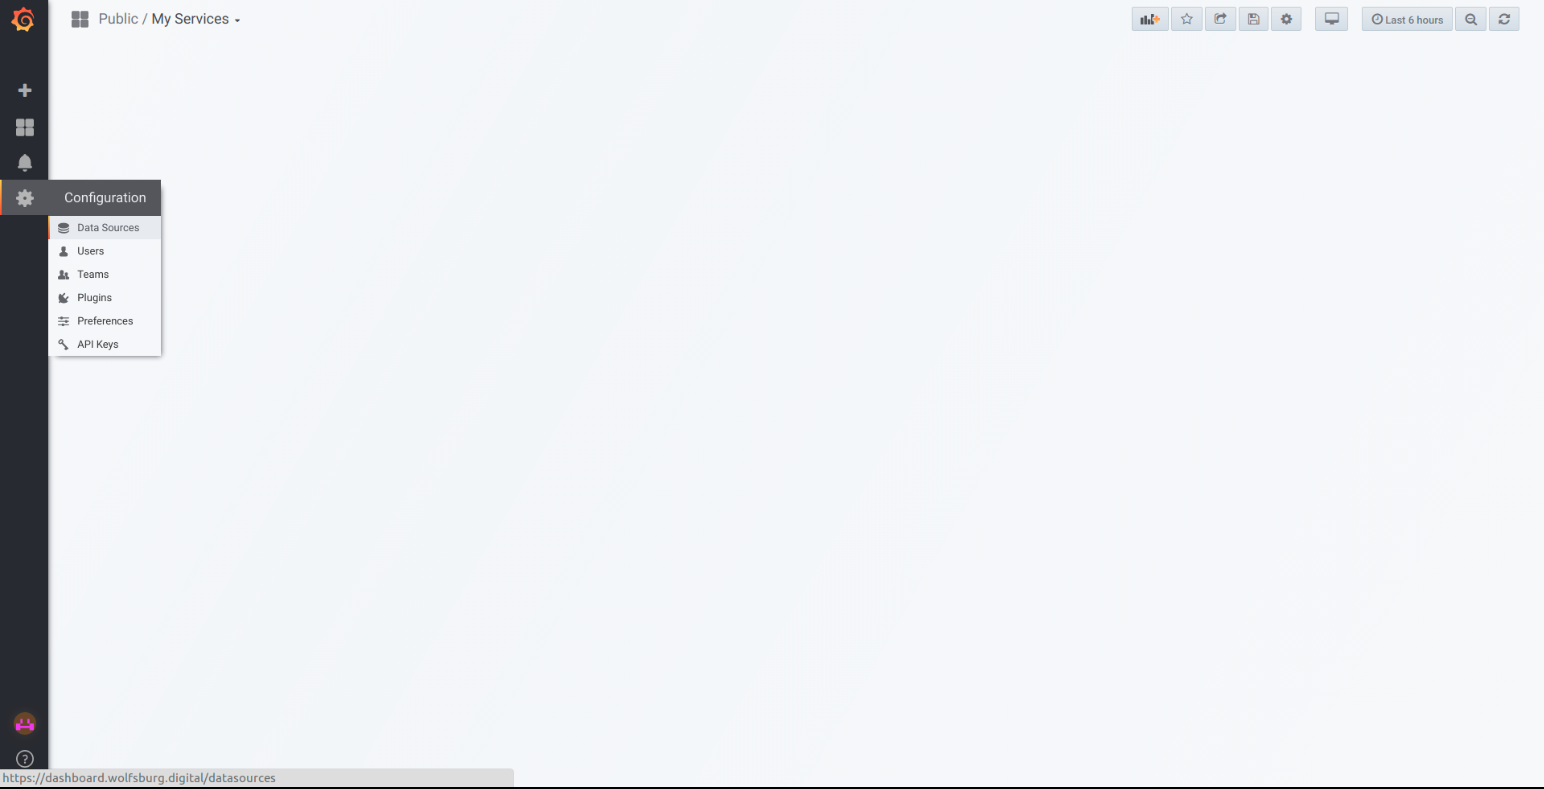
- Click in the Add data source button
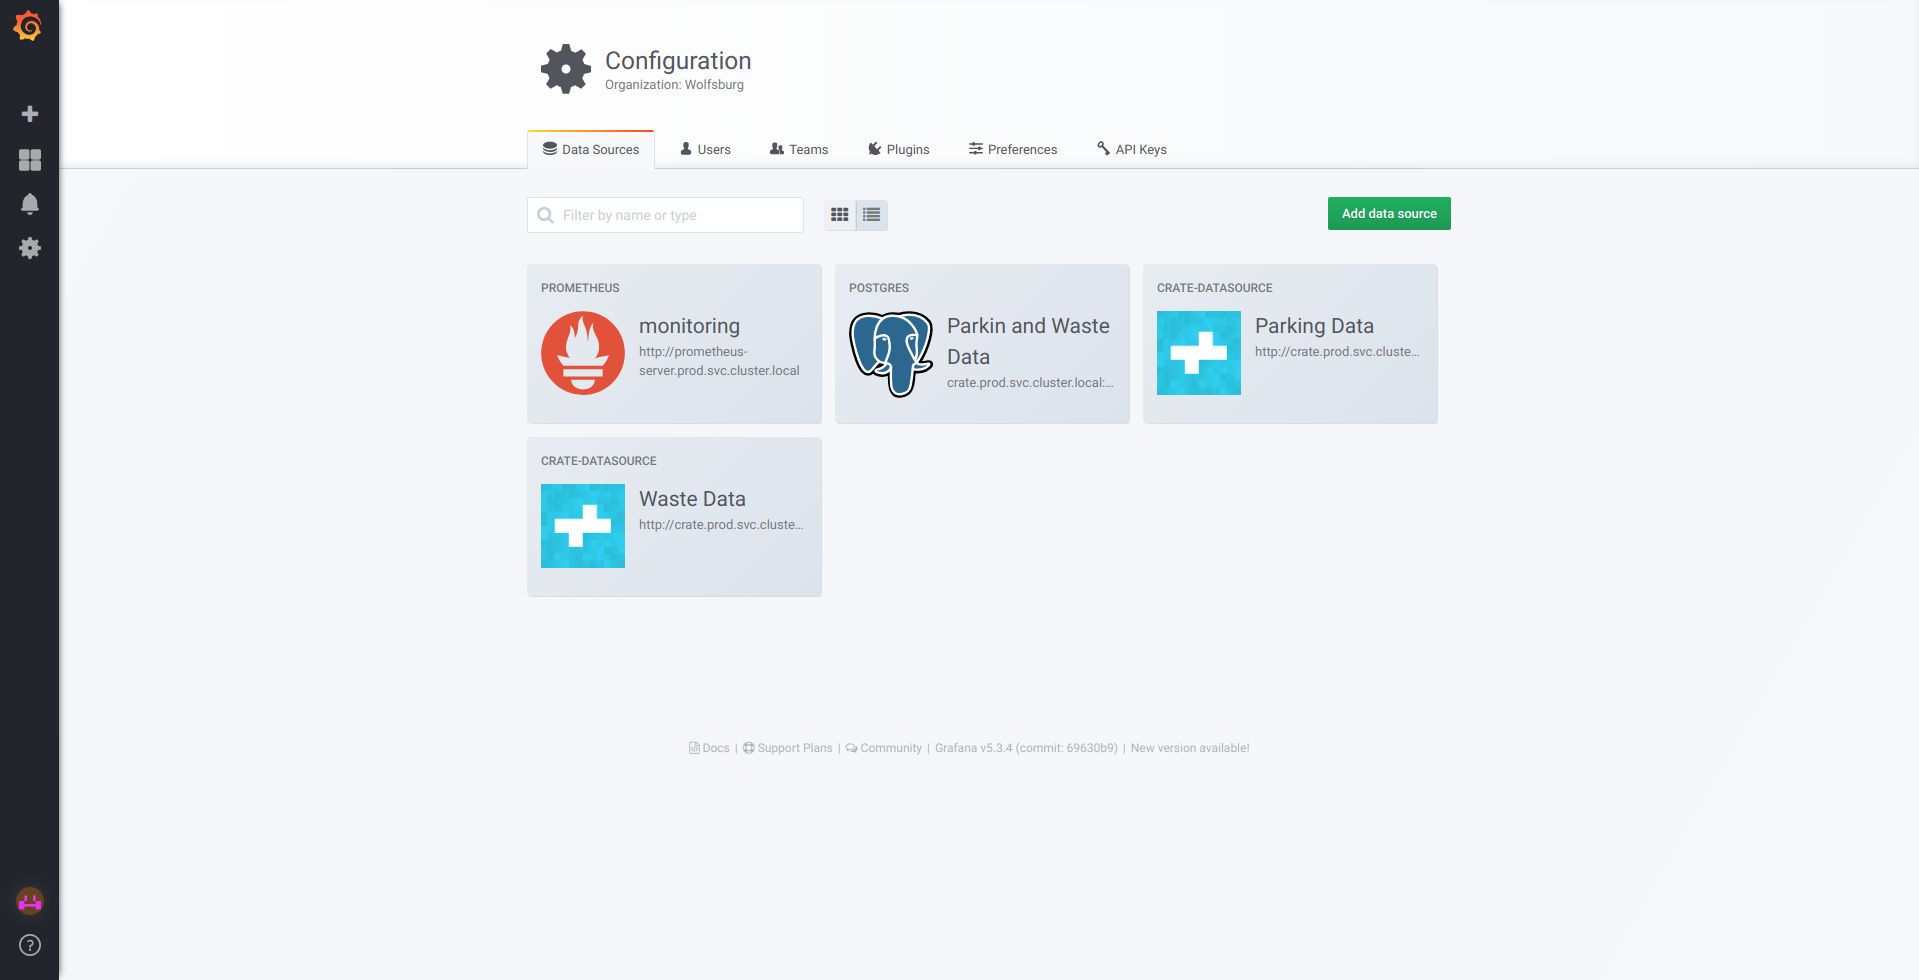
- Fill all the fields with the desired configuration and click Save & Test

5.6.2 Start new dashboard / Import dashboard#
To create a new dashboard you need to access the Dashboard under the Create section, and after that you will be asked to select a new visualisation panel to add to the dashboard.

Select the Graph option. After that, a new panel will be created, that you can move and resize as you wish.

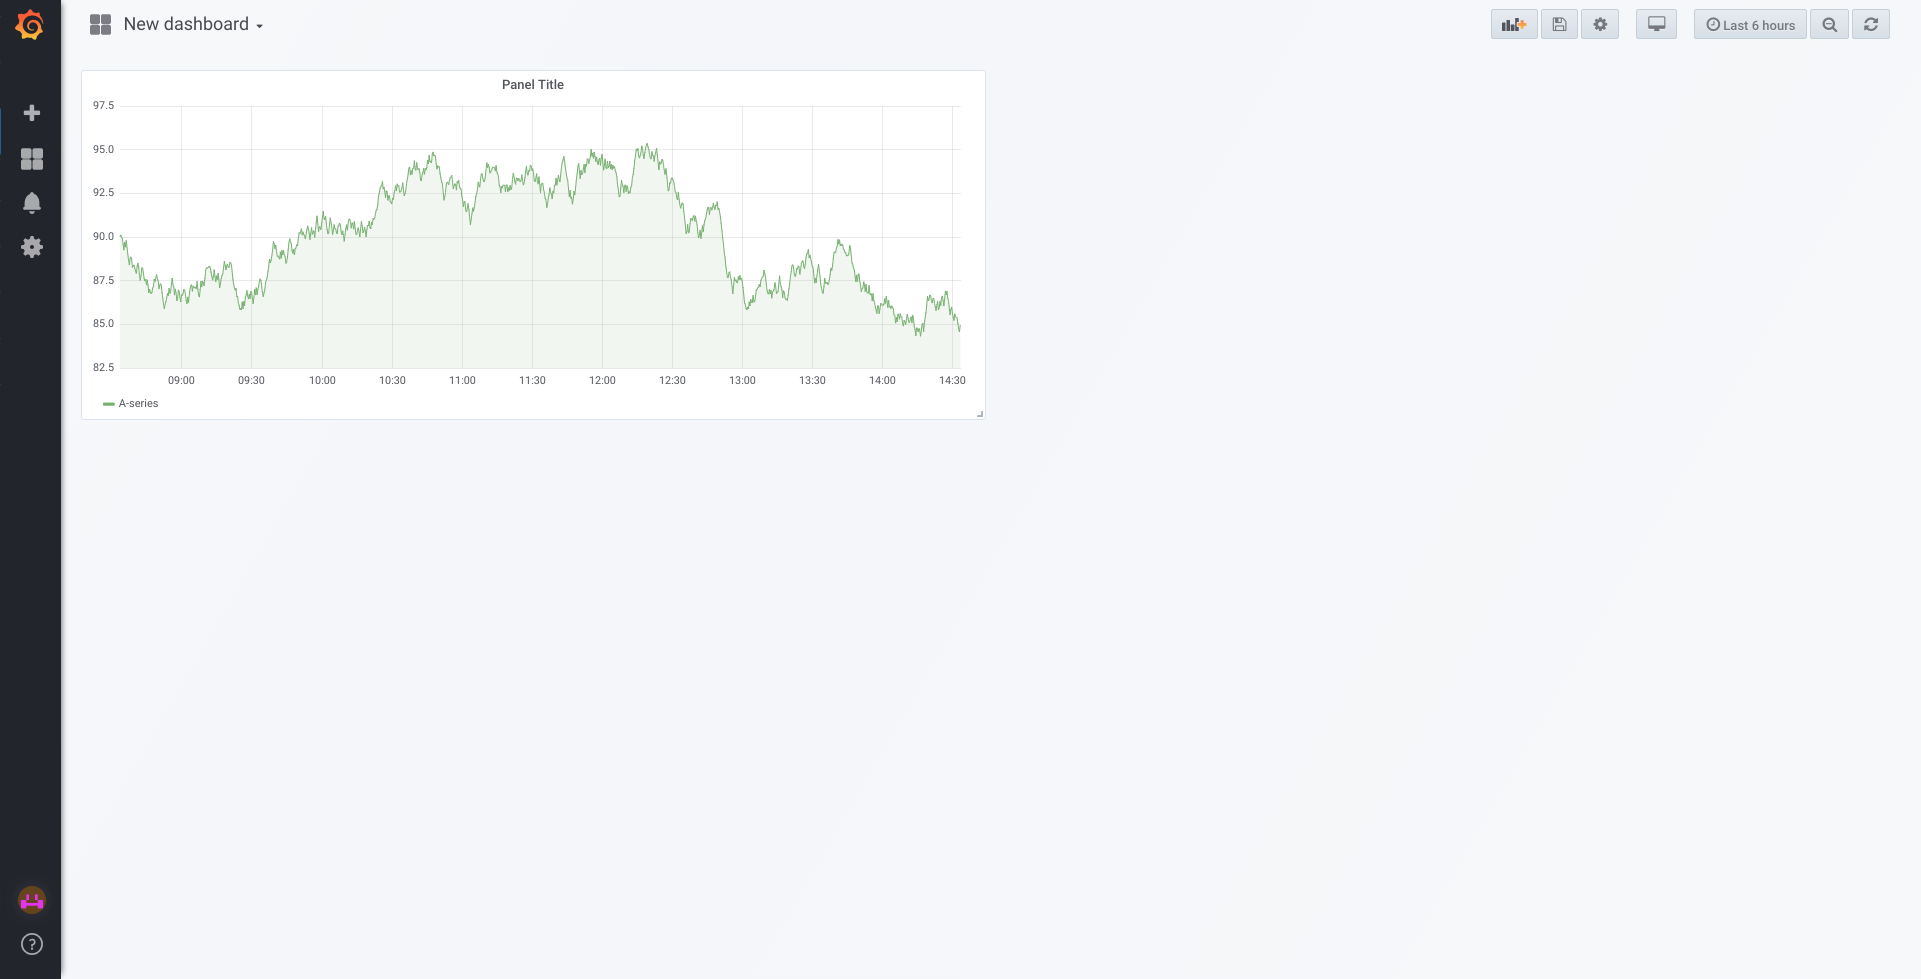
At the top of the panel click on the down arrow next to Panel Title and then select Edit to configure the panel.
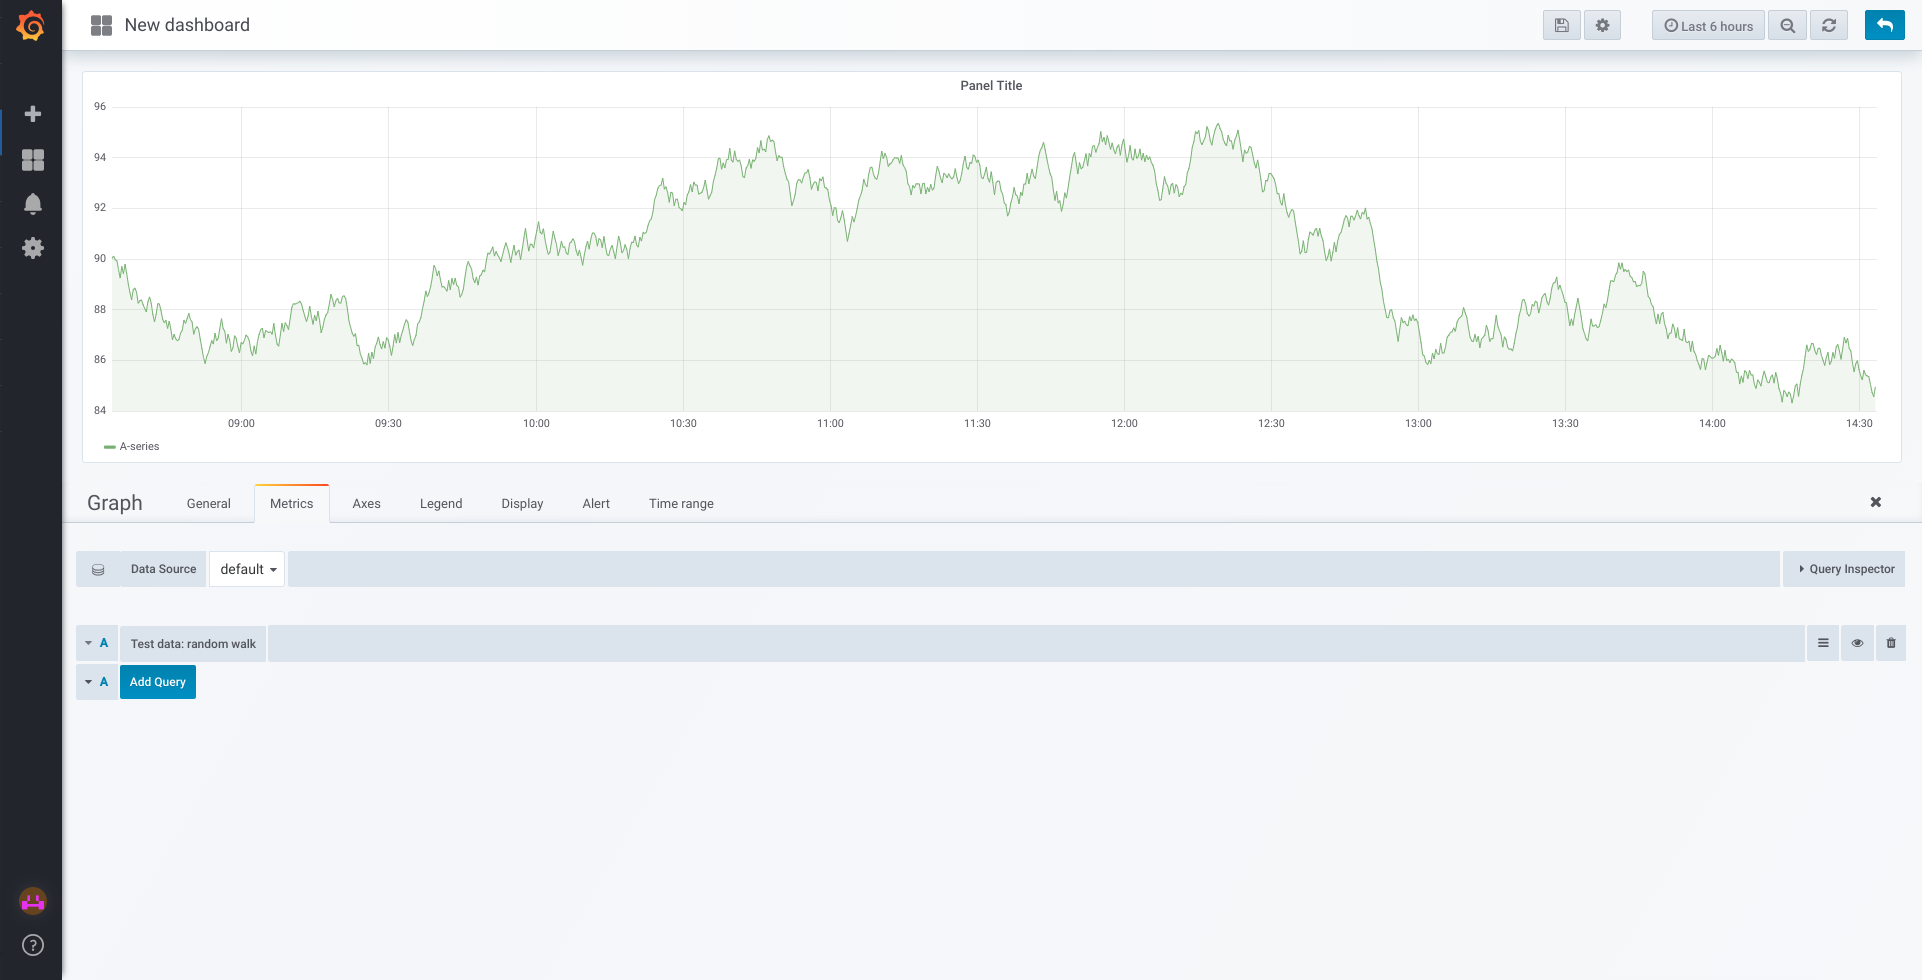
At the configuration panel, you will be presented with several sections:
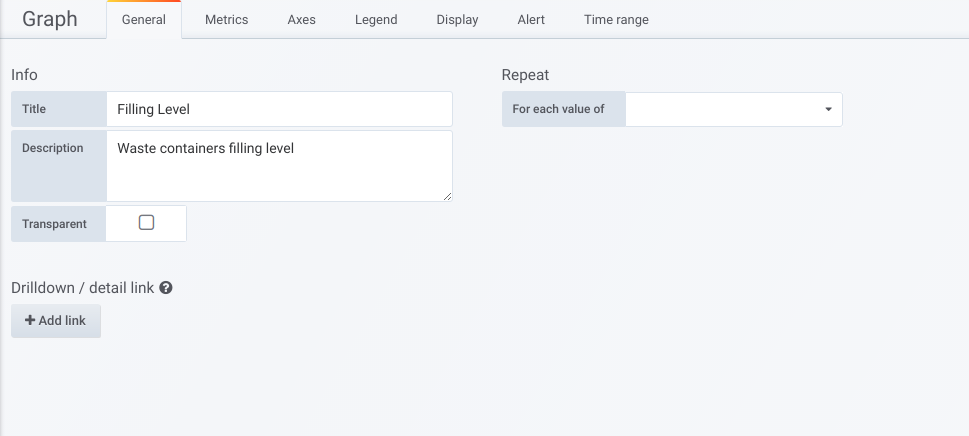
General
Set static data as name and description of the panel.
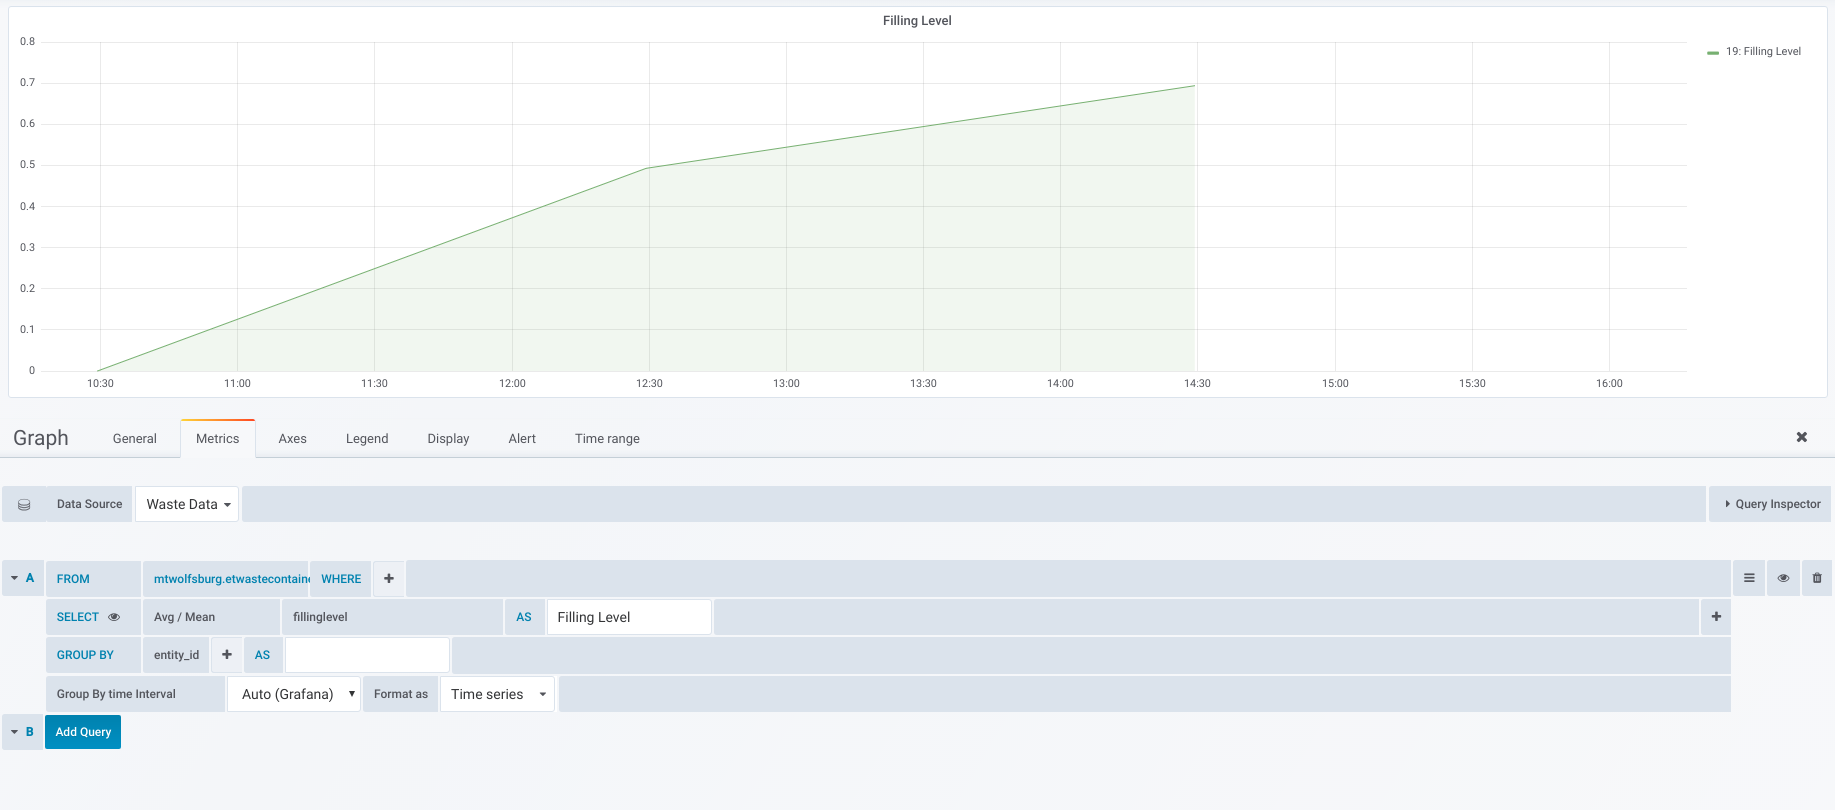
Metrics
Section where you choose the data source and query that will feed the chart.
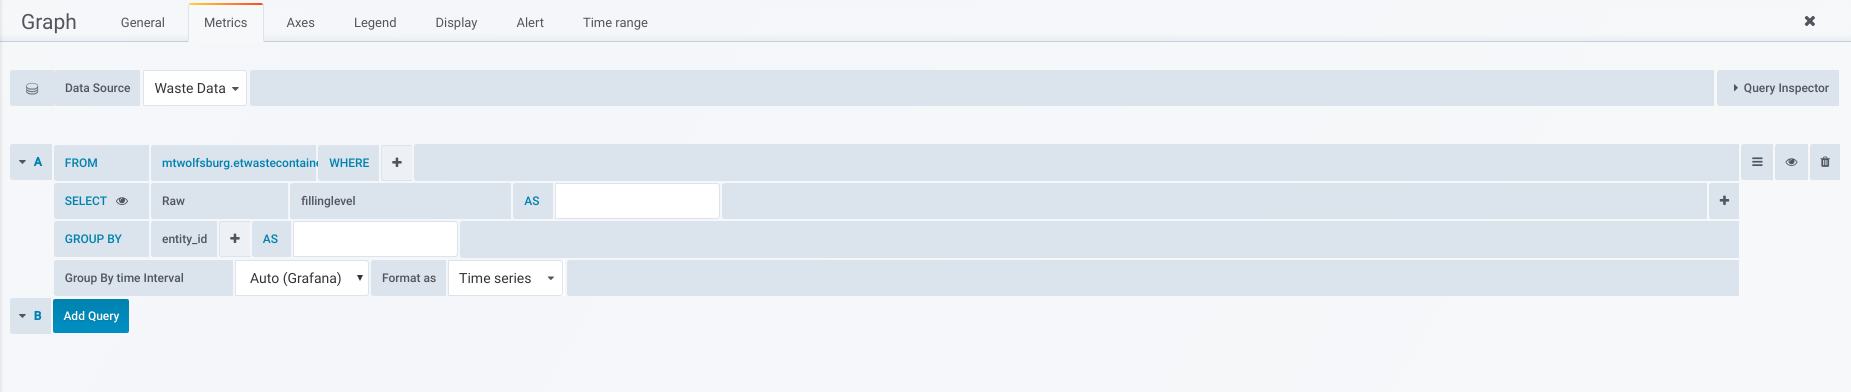
If you use the example of the previous image you will be able to see the filling level for all available waste containers.
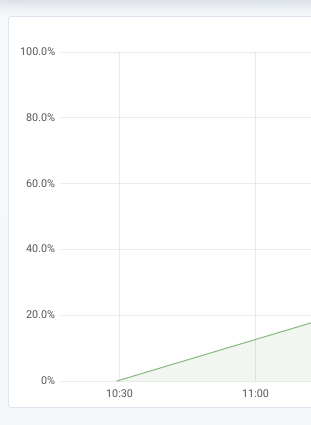
Axes
Section where you can configure the chart axis.

For the waste container filling level, we need to use the unit percent (0.0-1.0) for the Y axel, use 1 for Decimals and set YMin to 0 and the YMax to 1. After that you will noticed that the Y axel units changed.
Legend
Here you organise the way that you see the information related with the chart. For this case we will set the legend as a table, to the right where we can see the minimum, maximum and current value for each container filling level.

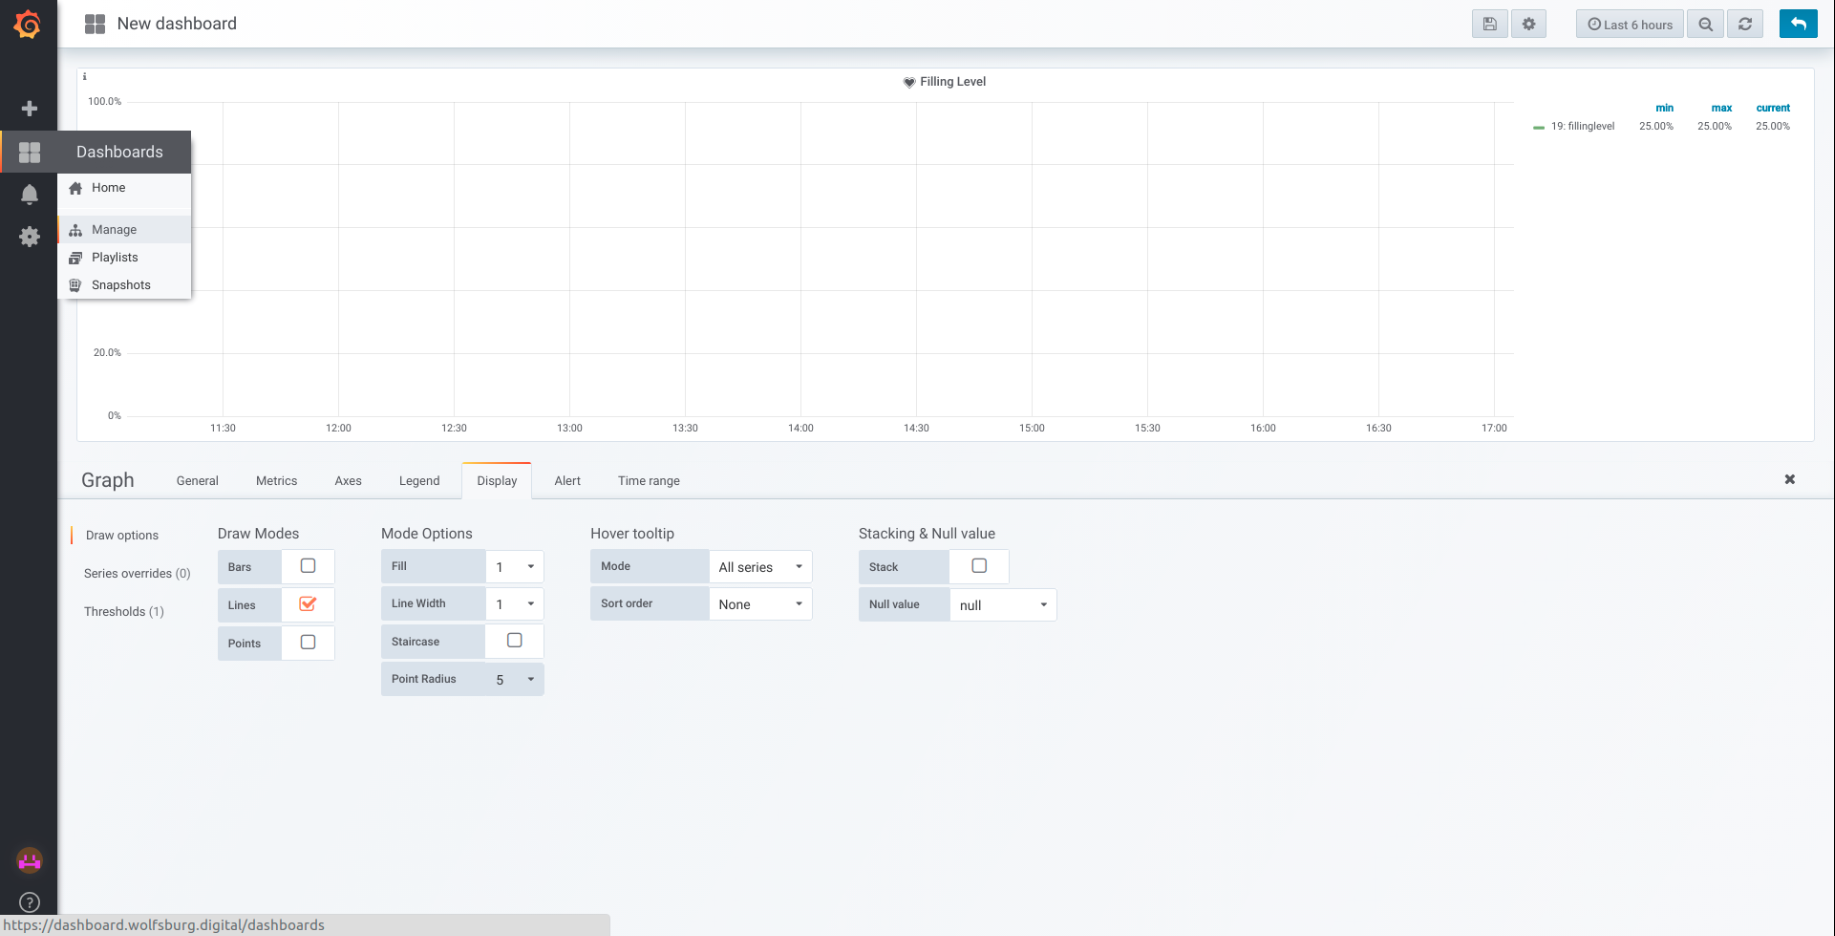
Display
This section allows you to choose the way the data is represented on the chart. For this case the data will be represented with lines.

5.6.3 Save Dashboard#
In order to save all changes regarding the dashboards you must do it manually every time you created/update a dashboard. For that you need to click on disk icon positioned at the top right corner of the window.

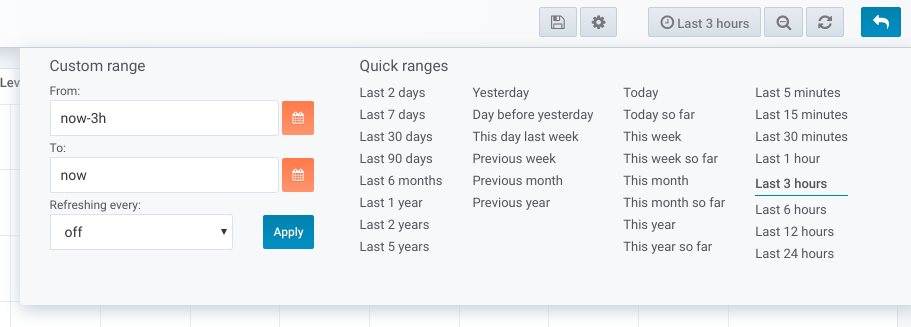
5.6.4 Dashboard time representation#
All the panels that are part of dashboard, represent data according to a specific time range. That time range can be defined at the top right corner of the portal.

If you click on the time button you will be able to change the time range that you wnat to see.
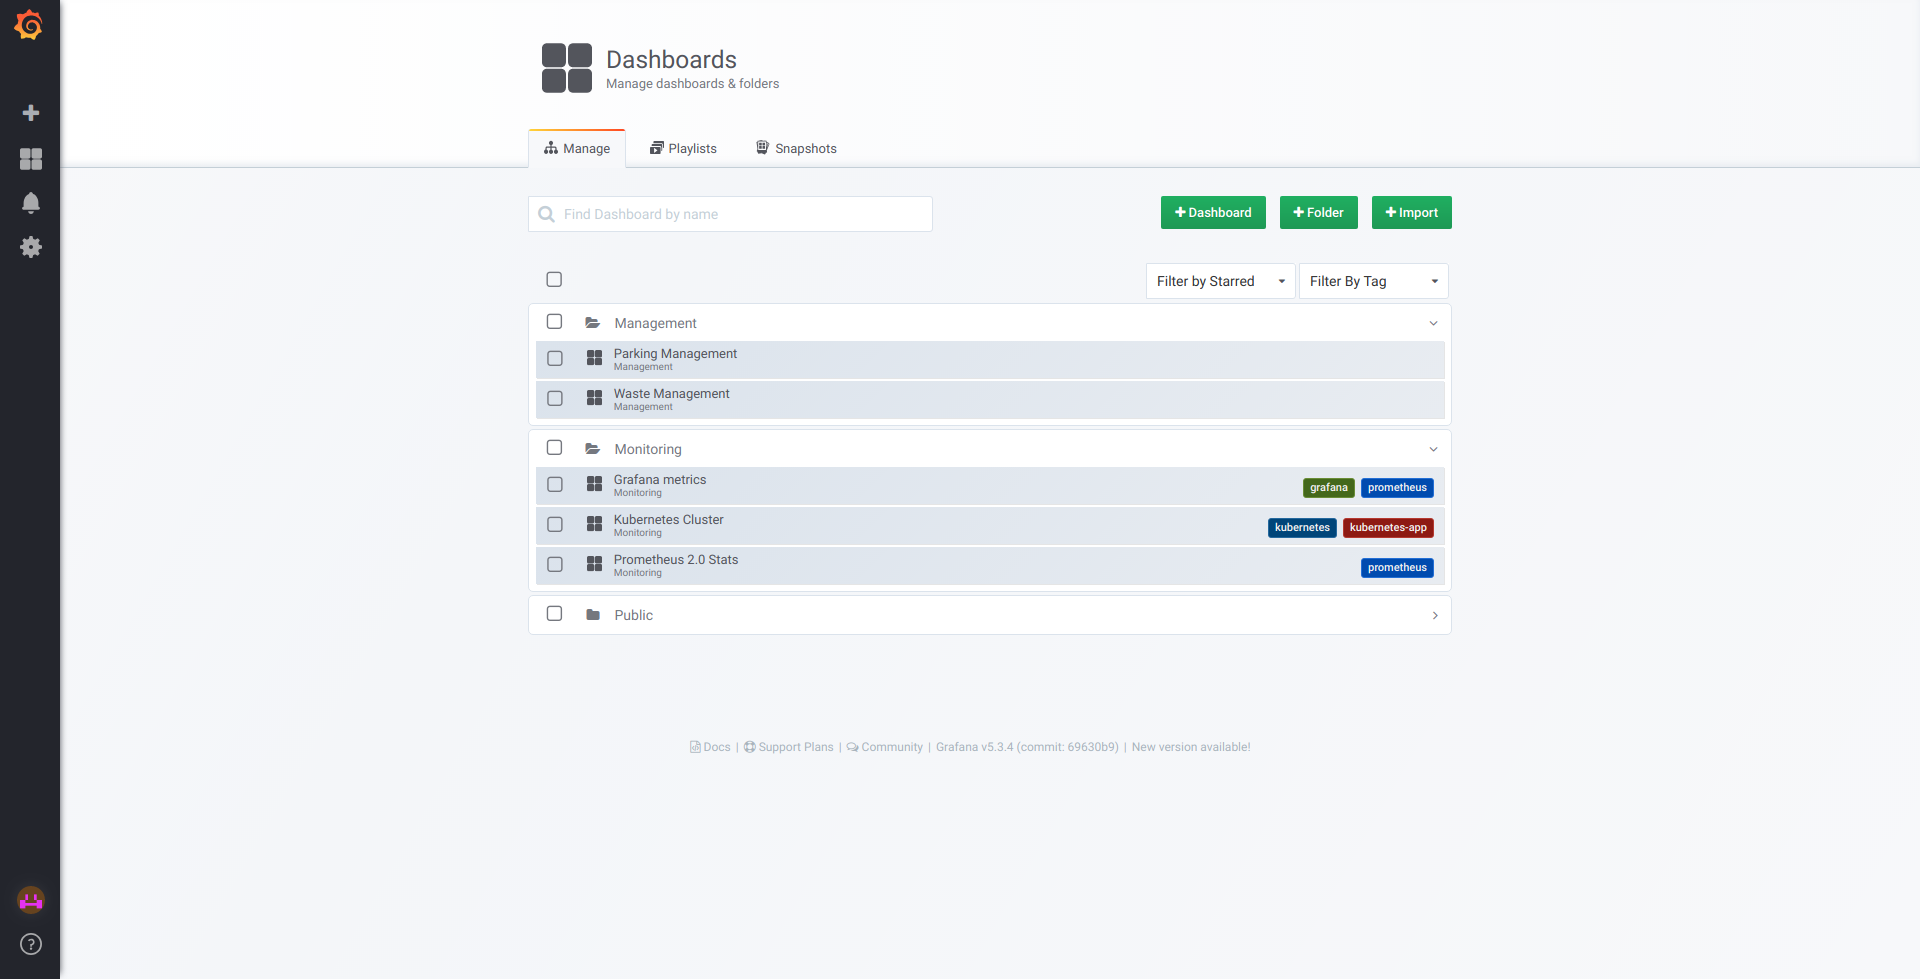
5.6.5 Dashboards organisation#
The dashboards can be organised as you wish. For that you need to access Manage under the Dashboards section.
After that you will be able to see and manage all folders and dashboards.